
Transplanting Tulips | Advantages, and Disadvantages of Transplanting Tulips
For a good reason, tulips are one of the most beloved flowers in the world. They are graceful and beautiful, and their petals come in various colors and patterns. However, tulips are not hard in many parts of the country. If you live in a cold climate, you may have to transplant your tulips into a warmer location if they aren’t doing well. There are several ways to transplant tulips, and each method has advantages and disadvantages.
The three most common methods for transplanting tulip bulbs are digging up the bulbs from the base of the plant, cutting off the foliage so that only roots remain, and planting directly into prepared soil or potting mix.
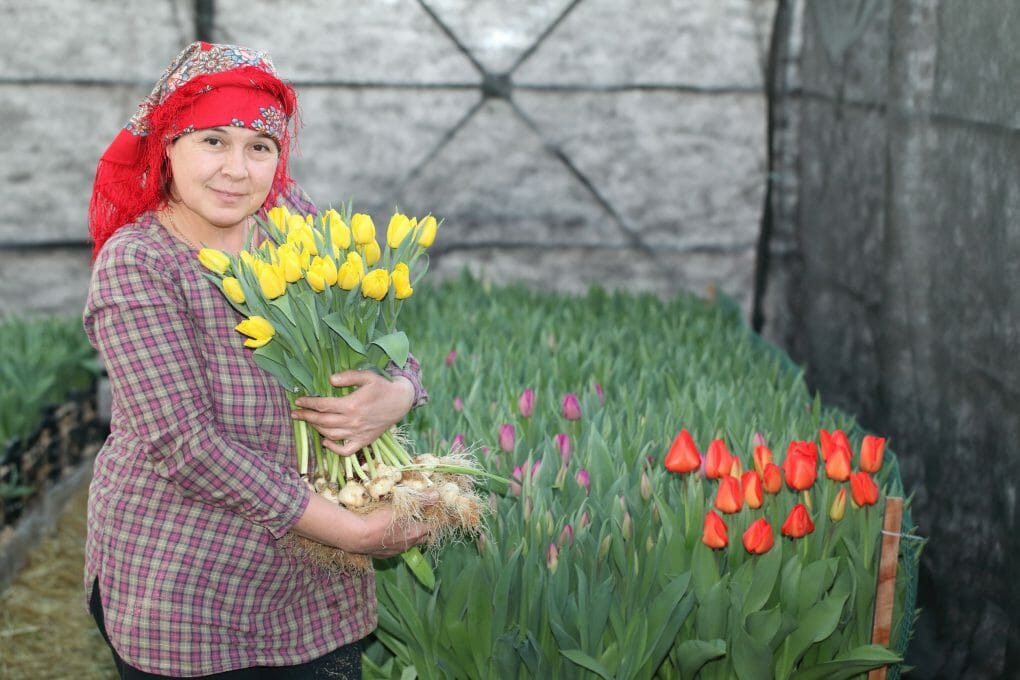
Table of Contents
The Ideal Time to Transplant Tulips
If you live in an area where tulips are not typically planted, it is vital to research the best time to transplant them. Tulip transplants should generally be done in early summer or fall, depending on the variety of tulips you are growing. However, some varieties may require a later transplant due to their slower growth rates.
Advantages and Disadvantages of Transplanting Tulips
Advantages of Transplanting Tulips
- Dig-up bulb methods allow you to move your tulips into a location that is warmer or cooler than the original location. Additionally, by removing the foliage from the tulip bulbs, you can ensure they receive plenty of sunlight and nutrients.
- Move the beauty from one place to another.
- You may make symmetry if you want!
- Exchange perennial flowers with your friends and neighbors, such as tulips.
- Planting perennials that will return each year is simple.
- Enjoy watching tulips expand and proliferate every year.
Disadvantages of Transplanting Tulips
- Digging up bulb methods can be time-consuming and labor-intensive, often resulting in more damage to the bulbs than planting directly into the soil or potting mix. Additionally, cutting off the foliage of tulip bulbs can cause them to become leggy or weak in growth. Finally, transplanting tulips can be difficult if you do not have experience.
- One disadvantage of transplanting tulip bulbs is that getting them back into bloom may be more challenging if they do not take well in their new location. When to transplant tulips
- Transplanting tulips should generally be done in early summer or fall, depending on the variety of tulips you are growing. However, some varieties may require a later transplant due to their slower growth rates.
Methods of Transplanting Tulips
Trenching Method
Instead of making individual holes for each of your tulips, you create a trench that can hold them all, place the bulbs inside, and then cover it up again.
As a side note, you can trench any bulb, not just tulips, so that a tiny crocus bulb wouldn’t get planted as deeply as a tulip bulb. The general rule is 3x the height of the bulb. If you have large, bulbous bulbs, you will plant them deeper than scrawny bulbs. Water your bulbs, and soak those tulips thoroughly. It must last longer than a light sprinkle.
Install your pest fence. Plastic fencing will do with 1″ by 1″ size. The metal type is an alternative. Avoid using cotton or rope because hungry neighbors, voles, moles, squirrels, and chipmunks can all chew through the rope. The fence will be laid on the ground like a blanket on a bed. The plastic fence is advantageous because it can easily be cut to fit your trench.
Crown And Root Method
This method is similar to trenching but uses larger pots or containers to accommodate all tulip bulbs. You first lay down a substrate layer on top of which you will place the tulip bulbs crown end downwards. Ensure all roots are contained within this area and do not extend beyond the surface of the potting mix. Then, cover everything with fresh soil and water well.
Pot-And-Pull Method
With this method, you remove one or two pots from your garden in early summer or fall, fill them with fresh soil and replant tulip bulbs in a new location. If you are transplanting tulips from a garden bed, follow the planting directions that came with your bulbs. Be sure to use enough mulch around each bulb and water well after transplanting. There are several different tulip transplanting methods that you can use, depending on the bulbs you have and the location where you will be planting them.
Picking Method
This is the most common method for transplanting tulips. You first identify the planting spot where you want your tulips to go, remove any existing soil and vegetation, digging down as needed to reach bedrock or hardpan. Then, using a bulb planter or trowel, make 1-3 inch deep holes in which you plant each tulip bulb upright in its hole (make sure they’re not buried). Finally, fill the holes with fresh soil and water.
Transplanting Tulips
Things You Need:
- watering container
- hand shovel
- low nitrogen fertilizer
- container liner
- tulip bulb transplant kit (usually comes with a planting guide)
- potting soil or planting mix
To transplant tulips successfully, follow these steps:
- Prepare the planting area by drilling small holes in the soil and adding organic matter such as compost or aged manure. This will help with root growth and tulip success.
- Once you have decided the best time for your particular Tulip transplant, prepare your garden accordingly by removing any dead vegetation and ensuring adequate moisture available. Be sure to give your new bulbs enough sunlight and fresh air to begin growing correctly. When everything looks ready, carefully dig up each bulb with a spade before replanting them into their new location.
- Dig a hole big enough for the stem of your tulip and place it into the prepared planting area surrounded by soil that’s been loosened up using your hands or a trowel. Make sure to pack down all of the dirt around the plant so that there is no air space between it and the ground; this will ensure that water can easily reach its roots. Water gently until you see new bud development, then add more water if needed until it reaches peak saturation.
- If you are transferring bulbs from one light to another, remove any existing foliage before cutting away about half of an old bulb at the base where leaves naturally fall off. Remove any browned areas too! Cut off just above flush with stem (not including flower heads), ensuring not to damage flowers or stalks very much in the process. Discard former foliage, etc., being especially careful not to sever stems.