
A Beginner’s Guide on How To Take Care for Gardenia Outdoors
Gardenias (Gardenia jasminoides aka Gardenia augusta) are native to tropical and subtropical parts of Africa and southern Asia, where they flourish under high humidity, strong light, and warm temperatures. Gardenias have been cultivated in China for over 1,000 years and were introduced to the US in 1762 by Alexander Garden, who gave them their name. Gardenias can only be grown outside in USDA zones 8 to 11 in the South and along the Pacific Coast. To be honest, the plant is finicky and requires more care than other flowering shrubs.
Gardenias are not the ideal outdoor plants for inexperienced gardeners. However, if you just follow the basic requirements for taking care of this plant, you will be rewarded with having beautiful flowering plants in your yard that give off lovely scents. Here are the basic steps on how to take care of gardenias outdoors. Here are some general guidelines for caring for gardenias outside that should be followed.
Table of Contents
Gardenia Growing Requirements
Light
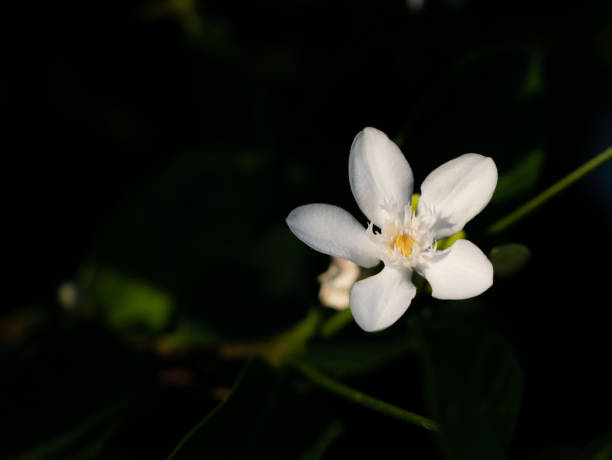
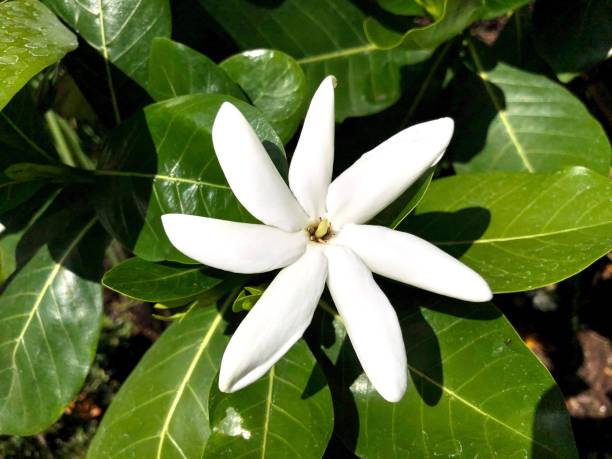
Gardenias should be planted in the shade, ideally out of direct sunshine in the afternoon. Gardenias thrive in hot regions with early light and afternoon shade. In milder climates, they may take full light, especially if their roots are covered with organic mulch. Gardenias in pots should be placed in bright sunshine or filtered shade, away from direct sunlight. In too much shade, gardenias have long, spindly stalks with weak, thin leaves. They don’t produce as many flower buds, and those that do form may fall off before they open. Gardenia flowers that receive too much sun brown faster than those that receive some shade.
Water
Rainwater is totally recommended instead of watering your plant with tap water. Gardenias require at least an inch of water each week to thrive. Don’t allow the plants to get fully dry before watering them, and do so on a frequent basis. The buds and leaves may fall off if you’re not consistent. Maintain constant moisture in the soil but not soggy. Excessive moisture in the soil causes air to escape and fungus to attack the roots. The plant may perish if the dark green leaves become yellow (chlorotic). Minimize watering throughout the winter.
Humidity
Gardenias prefer a high humidity level of at least 60%. Spread a layer of pine straw, bark, or organic mulch to the soil with a depth of two to four inches to help preserve moisture in the soil and suppress weeds that take up too much water.
Temperature
Gardenias are very sensitive to temperature. They prefer 18.3°C (65 ° Fahrenheit) during the day and 15.6°C (60 ° Fahrenheit) at night. If it goes beyond that temperature, buds may drop that are already developed.
Soil
When planting outside, it’s essential to evaluate the soil pH and amend as needed to produce perfect conditions for the plant. Gardenias are acid-loving plants that need soil with a slightly lower pH between 5 and 6, rich in organic matter. which is met by standard potting mixes with a peat basis. A teaspoon of agricultural sulfur sprinkled into the planting hole may assist to reduce the pH of the soil. When planting, use peat moss or compost, and then lay a few inches of mulch around your plants to keep them moist.
Soil compaction is typically a collection of fine or coarse particles and pores that cause the surface to be less resistant against percolation by rainwater – water ends up flowing faster across surfaces that are more compressed. If there’s no permeability, cultivators must bring in horizontal tillage equipment such as potato planters (for mincing), etc. in order for plants to take advantage of garden irrigation systems.
Gardenia Soil Mixture
Avoid thick, alkaline clay with poor drainage and coarse, sandy soils while growing gardenias. The ideal mixes are equal parts fibrous loam, peat moss, and well-decaying manure, or one-part loam, one part leafmold, and one part well-decayed manure. Dig a hole about a foot deep and two feet wide in loam or sandy soil and fill with the soil mixture. If the soil is thick clay, dig a bigger hole and mix in some coarse sand with the aforementioned combination. Some gardeners believe that in thick clay, we should dig a 3-foot-deep trench and stuff the bottom foot with crushed rock or gravel to provide greater drainage. Since gardenia has shallow roots, avoid gardening around the root zone once settled.
Soil ph Level and Nutrients
Before employing aluminum or iron sulfates, a thorough examination of the soil acidity with a soil test should be performed, as there is always the risk of burning the roots. This is manifested by a browning of the leaves, initially at the tips, and eventually by the loss of foliage. Acid soil gives a good response to tree and shrub roots, which are either sapcalculated, holding acids in the leaves or root hairs. Another reason acidity may be caused by too little water; watering with rain is better than watering daily with hard tap water.
When the soil is very acidic. Bud drop happens when the iron and aluminum become too soluble and toxic below pH 4.5. When the soil is alkaline (pH more than 7), the leaves get chlorotic. Organic substances, such as peat, will help keep the soil acidic.
Once the soil is no longer acidic and alkaline, it can be amended to help remedy this problem. Add gypsum (1/4-1 teaspoon per gallon), sulfur 2 inches deep for 6 months, or rake in some organic mulch such as wood chips. Supplemental fertilizers must be held back until after curing has occurred. If beneficial microbes are killed by high levels of these compounds while they decompose naturally, their absence may also be the cause. When soils are too acidic, calcium is used first in the soil before it may get lost; this leads to aluminum toxicity and chlorosis. Aluminum also leeches out magnesium from plants as well as iron if these metals are not available for biosynthesis (below pH 4). This can lead to eutrophication of water bodies by nitrates that grow there on polluted grounds when sulfur finally breaks down into sulfides.
Calcium deficiency is another cause of chlorosis. The calcium content in the soil tends to be much higher than that present initially, and as with alkalinity; it declines over time (time being relative) Short saturated periods also create problems deeper down where plant roots are beneath a thin layer of topsoil before root heat enters the soil and lifts up minerals from lower levels due to its heating properties. If excessive amounts become soluble they can cause plant problems or lead to the development of scabs. Leaf scorch is a physiological reaction that occurs when there are certain chemical imbalances in plants which are brought on by stress caused by their outer skin drying out too aggressively, due to weather conditions and high temperatures – This can be associated with factors such as acidity (more specifically a pH above 5), salinity, nitrogen deficiency, etc.
A well-maintained soil should be able to maintain the ideal range of pH for optimal plant growth and reproduction. This can depend on various factors, but manuring or regular replenishment is always important in order to eliminate deficiencies as it maintains beneficial microorganisms which promote decomposition processes while removing excess salts from the earth that could harm plants. Regular applications of soluble fertilizers also improve nutrient availability through improved uptake by plants (compared with application of nitrogen fertilizer alone), which in turn aids the release and uptake.
Some soils are deficient in essential micronutrients such as zinc, calcium, or iron. These can be remedied by topdressing and were formerly called “bouncing”. The soil surface to a much higher target than initially known, but whose name comes from lawn mowers: when vertical cultivation is used intensively over time it eliminates rooting areas that could enclose micronutrient-deficient plant parts, but in recent times it has become reconditioning methods that take advantage of the microorganisms which break down and recycle these minerals – thus leading to increased nutrient uptake from the soil by plants.
Fertilizer
In bright, warm conditions, gardenias are heavy feeders to some degree. Feed them with 1/4 teaspoon solution of 15-15-15 (Nitrogen, Potassium, Phosphorus) fertilizer once a week diluted in 1 gallon of water. Feed acid fertilizer to garden plants around mid-March, then again in late June.
In four seasoned regions, feed the gardenias a dose of acidifying fertilizer (like azalea fertilizer) in spring after cold winter has passed and feed again during mid-summer and late June. If you intend to overwinter your gardenias outside, do not fertilize them in the autumn since new growth may be damaged if temps dip below 15 degrees F. Feeding should be discontinued in late summer to give new growth time to harden off before the cold season arrives.
Consider choosing a fertilizer that contains iron and magnesium since chlorosis or yellowing of leaves, is a common problem with gardenias.
Feed outdoor container plants with an acidifying fertilizer every three weeks. Plants may also benefit from frequent applications of coffee grounds, which offer a slightly acidic mulch, as well as applications of fish emulsion or blood meal, which can assist increase soil acidity.
Pruning Outdoor Gardenias
Light pruning is beneficial to gardenias because it removes dead growth and eliminates discarded blooms. Gardenia bushes should be pruned after they have finished blooming in the summer to avoid removing any buds. Make sure the variety you’re raising only blooms once and has finished its blooming cycle before trimming. If it blooms more than once, remove fading flowers right below the leaf node to promote recurrent flowering. Completed blooming cycle typically in early to midsummer. Gardenias bloom on new growth, thus trimming from autumn to spring will destroy the branches from which blooms will sprout the next spring. Gardenias may need to be shorn back on occasion to encourage thicker, more lush growth, and this should be done after flowering as well.
Pruning shears should be sanitized to prevent diseases from spreading. Wash the tools with hot water and dip the blades with concentrated household disinfectant to kill the pathogens. Allow it to sit for a few minutes before wiping the blades clean with a paper towel.
If you want your gardenia in shape, light prune in February or March after the last flower shed.
Don’t be worried if your shrub’s heady, milky white blossoms turn a disgusting shade of brown; it doesn’t indicate it’s dying. It just means the blooms have faded. The plant may be tip trimmed shortly after flowering, but don’t prune it beyond August or you risk reducing next year’s flowers by eliminating buds that are already growing. Gardenias should require relatively little trimming if grown under the correct conditions.
Planting & Location Tips
If you are a beginner and love to grow gardenia, you can follow these simple tips in planting.
- Gardenias like a tropical environment, however, they might suffer in full sun throughout the summer. In warm climates (Zones 8+), choose a location that receives early sun and some afternoon shade while avoiding the hot midday sun.
- Gardenias thrive in the fall. Gardenias should be planted at least 6 weeks before the last frost date in your area.
- It’s recommended to plant in the spring in cooler regions (Zones 7), as this will secure that the gardenia has plenty of time to sit before the winter. C hoose a location that receives full to partial sun. Gardenias should not be grown outside all year if you reside in Zone 6 or below.
- When deciding where to grow a gardenia, keep the powerful aroma of the blossoms in mind. While their aroma is pleasant in passing, it can become overpowering if placed near a window or well-trafficked location!
- Plants should not be placed any deeper than they were when they were first planted. Gardenias get irritated when they are planted too deeply.
- Gardenias require a lot of root area and thrive when planted widely apart and away from big plants. Annuals, perennials, and ground coverings should not be planted near them since they are surface rooted.
- Plant gardenias in a wind-sheltered position, but never against or near stucco walls or fences where the stucco finishing might be washed away by rain or the hose. What happens is, the stucco adds lime to the soil.
- The south side of your house is ideal to plant your gardenia as it will give light shade in midsummer between 11 A.M – 2 P.M.
- When it is excessively hot and there is little humidity, the sun burns the blossoms. Except when in full bloom, a gardenia shrub will benefit from syringing once or twice a day.
- Apply a thick layer of mulch over plants in the fall, around the first frost, to protect the roots from the winter cold. They suffer severe damage at temperatures of 15 degrees Fahrenheit (-9.4°C) or below, therefore cover the plants with a permeable cloth or other materials on the coldest nights.
Pest and Disease Management
Possible Gardenia Pests
Insects, including scale, aphids, spider mites, mealybugs, and whiteflies, are the most prevalent concerns, aside from low temperatures and irregular watering, which induce bud and leaf loss. Powdery mildew, leaf spot, dieback, anthracnose, and sooty mold are other pests that can be controlled. Affected plants will need to be removed and killed in many cases. Most of these pests may be eradicated with a powerful hose spray, or by using ecologically acceptable insecticidal soap or neem oil spray, but it also pays to attempt to avoid infection by providing adequate air circulation to the plants.
- Aphids – are little sap-sucking insects that belong to the Aphidoidea group. These little green or gray insects sucking sap from stems and leaves, as well as disease pathogens from plant to plant, leave sticky-sweet honeydew behind. They’ll normally submit to a heavy spray from the garden hose, but if that doesn’t work, you may need to resort to insecticidal soap.
- Spider Mites – these pinhead-sized sucking arachnids (Tetranychidae spp.) enjoy the heat. They feed on the underside of the leaf, causing white dappling and eventually weakening the plant as a whole. They’ll cover blossoms with webbing as they spread. The best technique is to avoid them by keeping the foliage hydrated and dust-free. Spider mites prefer dirty leaves and water-stressed plants.
- Whiteflies- scientifically known as Trialeurodes vaporariorum is a sap-sucking member of the insect family Aleyrodidae. These critters feed on the sap of your flowering plants’ leaves. Sooty mold is a problem for gardenias because they drop honeydew. With neem oil spray or insecticidal soap or even a strong blast of water from the garden hose, you can get rid of whiteflies.
- Scale Insects- Coccus hesperidum are small, oval, wingless, shiny, reddish-brown bugs. They feed on sap and excrete a sticky substance that can encourage black sooty mold growth. Or soft scales can destroy leaves and the gardenia’s ability to photosynthesize. If you catch them early enough, you can scrape them off with your fingernail or a paper towel dampened with rubbing alcohol.
- Root-Knot Nematodes-Meloidogyne incognita are plant-parasitic nematodes. They made their way in and began eating the roots of the shrubs. It can lead to a yellowing of the leaves and even stunted growth or the death of the branches if knots or galls are allowed to grow in these areas. This type of plant is commonly found in subtropical regions and thrives on sandy soil. Make sure to choose grafted gardenia varieties that are resistant to root rot to prevent these pests.
Diseases
These beautiful, fragrant shrubs have a reputation among gardeners as “challenging” to grow, due in part to the wide variety of diseases that can attack them. Some grafted cultivars have become more resistant to disease as a result of advancements in hybridization, but there are still some conditions to be aware of, especially if you’re growing an older variety.
- Sooty Mold- Gardenias have long been associated with a smoky, moldy appearance. Fungus that causes it is drawn to honeydew left behind by sucking insect pests, such as aphids, scales, and whiteflies. It looks like oily soot on the leaves. Sooty mold can be spread from plant to plant by those pests. Fortunately, sooty mold is easy to remove, and it’s mostly just unattractive, not harmful. However, if left untreated, this fungal disease may progress to the point where it negatively affects the plant’s ability to photosynthesize. Because their feeding can defoliate or damage plant tissue, sooty mold-spreading insects pose a threat.
- Powdery Mildew- Erysiphe polygoni, a fungus that causes a floury dusting on the leaves, is the culprit. In the beginning, powdery mildew may only affect a few leaves, but it will eventually spread to cover the entire plant. If left unchecked, chasmothecia, which are initially pinhead-sized and light before growing larger and darker, may begin to form. Typically, this disease is most prevalent in the late summer and affects the youngest plants. It can cause leaves to turn yellow or fall off, as well as deform leaves and buds. Make sure your gardenias have enough room in the landscape to allow for good air circulation to discourage the fungi. Dispose of any infected tissue right away.
- Root Rot- Phytophthora, Rhizoctonia, and Pythium species of fungi and oomycetes cause root rot. If you spot yellowing, wilting, or falling leaves, you can see its effect from above. If the roots are damaged, the plant as a whole may perish. Root rot can be avoided if caught early enough, as is the case with so many other aspects of flower gardening. Prior to making a gardenia purchase, check the drainage holes in the plant’s bottom to make sure the roots are healthy and resistant to disease. To prevent root rot, plant in a dry, well-drained area and remove any plants that die from it. Replanting in the same spot should be delayed for a few years, or a resistant variety should be used instead.