
Indoor Gardenia Care Tips For Beginners – How To Grow, Maintain and Keep Your Plant Alive!
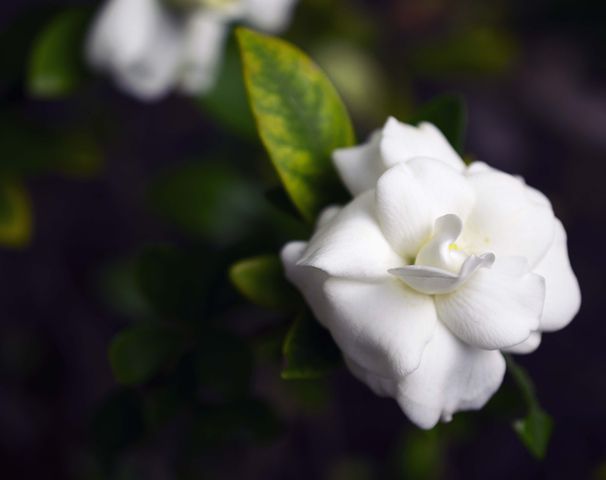
Gardenias are one of the most popular flowering plants. They come in all shapes and sizes. With proper care, gardenias can be grown indoors as well. They can be a wonderful way to bring a touch of elegance to your home. If you’re looking for indoor care tips for gardenia, you’ve come to the right place. This article is intended for beginners and anyone who wants to know how to grow gardenia indoors.

Table of Contents
Are gardenias easy or hard to grow indoors?
Gardenias are frequently considered hard to grow indoors. However, if you meet their basic needs, they will thrive. If your goal is to get beautiful, healthy, and well-bloomed flowers, you need to follow proper care and attention. The first thing that you feel will be cumbersome at the beginning, but in time it won’t seem problematic anymore. Pay attention to fundamental requirements and you will get the best results.
Plant Growing Requirements
Light
If you want to effectively cultivate gardenias inside, you must place the plant in an area with plenty of bright light for at least 6 to 8 hours each day. A sunny, bright location, such as a southeast-facing window, is perfect. This will give the plant lots of morning sun as well as light throughout the day.Windows facing southwest might be excessively hot, so don’t place the plant directly on the window ledge. Even if the soil is wet, heat and direct sunshine can burn the plant and cause the leaves to droop. As the seasons change, relocate your gardenia from one spot to another to ensure it gets enough light.
Be cautious in placing your plant in windows during the summer months, as it’s prone to sunburn because of scorching heat. The foliage becomes brown as a result. In more severe circumstances, the plant may wilt. Putting the plant slightly away from the window, or likewise placing a curtain or blind in the window, protects it while still enabling it to get enough of brilliant light. As for the fall and winter months, a southwest window might be ideal when there are fewer sunshine hours. Don’t be upset if the plant isn’t getting as much light as it did in the spring and summer. They can still thrive with just at least 4 hours a day. If natural light is insufficient, consider placing the plants beneath a grow lamp. This is an excellent method for providing abundant light to plants. Without adequate light, they won’t bloom.
Water
Check before watering. Insert your finger about two inches into the soil. It’s not yet time to water your gardenia if the soil still feels damp. Water your gardenia if the soil is dry. Alternatively, you may get a soil moisture reader for indoor plants, which can assist you in determining whether the plant requires watering.
Carefully water enough to keep the soil consistently moist. Gardenias dislike being dry, so keep their soil damp but not soggy. Never overwater them as it will cause root rot, flowers won’t fully bloom, and may develop brown spots on foliage. In contrast, allowing your gardenia to totally dry out may cause the plant’s leaves to drop off. It might be also difficult to revive the dried-out roots.
Choose water that is at room temperature. Coldwater can shock and harm your plant such as shedding foliage. Because of decreased evaporation from heat and sunshine throughout the winter, the plant may take less water, so you may water it less, allowing the top half-inch of soil to dry up before giving your plant a sip.
Great Tips: Instead of tap water, consider collecting rainwater. Rain also carries levels of nitrates, which are necessary for plant development. It also prevents you from introducing possibly dangerous chemicals to your soil. This method will keep your plant stay hydrated and cut off your expensive water bill.
Humidity
Gardenias enjoy and require humidity roughly around 50 percent. However, most homes just have dry air. There are lots of ways to add and keep the humidity level indoors.
Mist your gardenia every day.
You can place a humidifier to add moisture to dry indoor air. Avoid misting directly onto the buds and blooms as this may discolor them.
Grouping plants close together. It’s also an effective way to raise or keep the humidity as same as misting.
Set the potted plant on a saucer or drainage dish packed about an inch with gravel or pea pebbles, and water as needed. Fill the dish halfway with water, covering the pebbles with it. Place the potted gardenia on top of the gravel, ensuring sure the water does not reach the pot’s bottom. As the water evaporates, it must be replenished on a regular basis. The humidity level should range from mild to tropical.
Gardenias also benefit from a layer of organic mulch in the container — apply a layer of organic mulch on top of the potting soil. This is a fantastic technique to keep the roots moist without drowning them. Mulch can also assist to raise humidity levels.
Leave a bowl filled with dampened white string strung through the top of the pot. It will keep your indoor air exchanging moisture naturally since it evaporates more readily than in drier conditions. Drape potted gardenias with towels to avoid evaporation loss from cut stems during winter heating seasons when humidity is less likely to rise.
While gardenias thrive on humid air, it’s important to control the level. Too much moisture cause fungal development on the leaves. Circulating air will assist in drying the plant, avoiding moisture from accumulating on the leaves. During the winter season, the humidity level lowers because of central heating. Regular misting two to three times a day can help. Make sure the leaves are wet before misting again.
Temperature
Gardenias should be grown indoors in temperatures ranging from 65 to 70° F (18.3 to 21.2° C) during the day and 55 to 65° F (12.8 to 18.3° C) at night. The buds on the plant may drop off if the temperature rises beyond 70° F (21.2° C). Gardenias thrive at daytime temperatures that are comfortable for people. Remember to bring them inside when the weather cools. Your plants should be put in an area where air may easily flow. Maintain your plant’s safety by keeping it free from drafts. Plants that are exposed to colder evening temperatures are more likely to set blooms. Avoid sudden temperature drops as they can cause leaves and flowers to shed.
Soil
To grow gardenias effectively inside, use well-draining, high-quality, fresh soil. Use a good quality potting soil consisting of coarse sand and peat moss. Ericaceous compost or acidic compost placed into the soil will aid in slightly increase acidity levels. This is excellent for gardenias. You can make your own ericaceous compost by mixing together 20% perlite, 10% ordinary garden potting soil, 10% compost, and 10% coarse sand. Another alternative for soil is to purchase a rhododendron-specific mix, as this plant demands the same soil requirements as gardenias.
Importance of Soil pH
Gardenias require acidic soil to grow. The soil’s pH level should be between 4.5 and 6.0. If your gardenia’s soil is overly alkaline, the leaves will yellow and fall off, and the plant will most likely not blossom. As you water and fertilize the plants, the pH level of the soil naturally varies. To ensure that the soil profile is still suitable for your plant, use a soil pH test kit to assess the soil’s state on a regular basis. To boost the acidity of the soil, irrigate your gardenia once a month with diluted vinegar or leftover tea. Some indoor gardeners boost soil acidity by spreading coffee grinds on top of the soil before watering. If possible, use organic coffee grounds. Gardenias that are grown in alkaline soil frequently suffer chlorosis (leaf yellowing) and fail to flower.
Fertilizer
Gardenias prefer acidic soil, therefore apply an acid-based fertilizer. Feeding your gardenia can help it grow in the confines of your home. The ideal fertilizer ratio for gardenias is 15-15-15 (nitrogen, phosphorus, potassium). Fertilize your gardenia every two weeks during the spring and summer, when it is in full growth mode. Select a water-soluble fertilizer designed for plants that require more acidity than other plants. To avoid adding too much fertilizer, dilute the solution to roughly half the recommended strength. It is preferable to under-fertilize the plant than to over-fertilize it. Under-fertilization is easier to fix than over-fertilization. You may also use organic plant fertilizer or prepare your own plant feed. Just make sure that anything you use is acidic or has a high acidity level. Fertilize the plant once every two weeks during the spring and summer when it is actively growing. When the plant is dormant in the fall and winter, this can be lowered to once a month.
Pruning
With minimal attention, these plants usually maintain a good, uniform shape. However, you may need to remove stems from time to time to shape the plant. If you need to shape or trim a houseplant, a pair of garden scissors will come in handy. Deadheading and eliminating woody branches also promotes the formation of additional blooms. When pruning, take care not to cut any new stem development. Gardenia blooms emerge from new stalks. Only aged and woody stems should be removed. Inspect the plant over the winter and remove any dead or broken stems.
Repotting
Gardenias are known for their slow growth. It takes years to fill their container. You can repot your gardenia if the roots almost filled the pot. The most evident indicator that your plant has outgrown its container is its roots protruding from the bottom. Remove the gardenia from its pot with care. Always choose a well-draining, peat-based soil that hasn’t had any lime added to it. Your new container should be clean, and it should be about 2 inches bigger and deeper than the previous one. If you’re having problems removing the plant, squeeze the container’s sides. This releases the soil, allowing you to ease the plant out without damaging it.
Brush any dirt or compost away from the root system using a soft-bristled brush. Fill the new container approximately a third with your preferred soil mix. Place the gardenia in the center of the container. The root ball’s top should be slightly below the specified soil level. Fill the container with dirt once you’re satisfied with the plant’s setting. Firm the soil down gently. Water thoroughly. After planting and watering, cover the potting soil with a layer of mulch.Organic mulch is especially beneficial. Organic mulches assist to keep the soil wet and humidity levels stable. Furthermore, when they decay and break down, they replenish the soil with nutrients, providing an added boost to the plant.
Propagation
Propagation is an excellent technique to obtain additional lants for free. Stem cuttings are a simple way to eproduce these plants. This is best done while the plant is being prun d during the spring and summer. Take 2 to 3-inch stem cuttings from healthy tems to reproduce.
Cut the plant right below a leaf node. New roots will sprout from this node, or bump. Dip the cutting into a rooting hormone solution. While not required, this fosters the growth of roots. After that, insert the cutting in a tiny pot with an equal mix of peat moss or compost and perlite. Water the soil to keep it wet. Keep the soil wet until the roots develop. To see if roots have grown, carefully lift the cutting from the soil. If you encounter resistance, it is an indication that the plant is establishing a root system. Once the roots have grown, transplant into a larger container and continue to grow using the appropriate soil to achieve the proper pH balance.Water can also be used to propagate cuttings. Simply take the above-mentioned cutting, remove all but the tallest leaves, and place them in a transparent vase or glass of fresh water. Every day, change the water. Roots will soon start to appear. When the roots are long enough, place the cutting in a container and continue to grow it.
What Type Of Pot Is Be t For Your Gar enia?
Clay or terra cotta pot is the best typ of plant container for a gardenia. Clay pots ar porous and allow water and air to circulate freely, hich is important for plants because they need both water and air to grow. Clay pots also retain mo sture and nutrients better tha other types of pots, which is great for g rdenias because they are prone to dryness. Gardenias like moist soil, so having a clay pot will help keep the soil moist and prevent it from becoming too dry.
Anot er important factor to consider when choosing a pot for your gardenia is the depth of the pot. Make sure the pot has a depth of at least 18 inches so that the roots of the plant have enough room to grow and spread out. You also need to make sure that the pot has good drainage so that water doesn’t accumulate in the bottom of the pot and cause damage to your gardenia’s roots. Finally, make sure the pot has a sturdy base so it won’t tip over during strong winds or rainstorms.
What’s the Best Location For My Gardenia Plants?
When it comes to placement, choose an area where your gardenia can receive adequate light, choose a location that is adequately ventilated, with flowing air and no drafts. Bathrooms might be a wonderful option if there is a window that allows enough light in. Showers and baths may give exactly the proper amount of humidity, creating the ideal tropical climate.
How Do I Know If My Plant Is Thriving?
To ensure that your plant is thriving, periodically measure the circumference of the blossom stalk to make sure it’s growing properly. If your plant’s blossom stalk is shrinking or getting smaller, it may be time for a new pot or another flush of blooms next year.
Common Grow Gardenias Indoor Problems
Possible Gardenia Pests
Growing indoors still attracts pests. You’ll have to deal with bugs such as aphids, spider mites, and mealybugs that eat the leaves, buds, and blooms. If you suspect that your gardenia has been infested with pests, isolate it instantly to stop it from spreading to other plants. A mix of one part water to one part mild liquid soap can be used to repel aphids. For spider mites and mealybugs, use the same water and soap solution – or neem oil, which is derived from the seeds and fruits of the neem tree, also known as Indian Lilac. Just treat the leaves and avoid the flowers and buds as it can cause damage. To assess for spider mites on your plants, lay a piece of plain paper under the leaf and shake the plant.
On the gardenia leaves, a grey fuzzy mold will grow from time to time. This mold grows on the feces of any of numerous plant-sucking insects. Sooty mold is rarely a severe issue, but if aphids or scale insects are very bothersome, they can be eliminated by spraying with insecticidal soap.
Disease Problems
Gardenias are especially susceptible to illness, particularly bacterial and fungal diseases produced by excessive humidity. Place the plant in an area with enough air circulation to protect it from disease. If the soil is not adequately drained and the roots remain wet for an extended period of time, the leaves will turn yellow and finally drop. Iron deficiency is another reason for yellowing leaves. For iron intake to be successful, the soil must be somewhat acidic. You can try adjusting the pH of the soil using a sulfur-containing fertilizer designed for acid-loving plants. Spray an iron foliar fertilizer on the leaves for a quick fix. Gardenia suffers from bud dropping because of inadequate watering.
Root rot is the most serious disease that can kill your Gardenia. This is usually caused by Phytophthora, Rhizoctonia, or Pythium, all of which flourish in the anaerobic conditions of wet soil. Because severe root rot can rapidly destroy your plant, prevention is the best solution.
Insufficient Light
Low lighting can result in weak growth and a lack of blooms. Luminous intensity on a sunny windowsill can be up to 50% lower than direct sunshine outside, and the light intensity decreases rapidly as you move your plant away from the window.
Overfertilizing
Too much fertilizing can do more harm than good to your gardenia. It only requires a few amounts of nutrients since it obtains the majority of its energy from the sun through the process of photosynthesis. Signs of overfertilizing are brown patches and edges of the foliage, lack of blooms, leaf drop, and on the soil’s surface, there are white fertilizer crusts.
Signs Of An Overwatered Gardenia
Overwatering is the most common cause of a Gardenia dying, therefore this should be the first thing you look for. More precisely, any problem that causes your plant to lie in wet soil for an extended amount of time raises the danger of root rot, which is generally deadly. Here are some signs of an overwatered gardenia:
- The leaves may be wilted, curled, or yellowed.
- Widespread leaves, branches flower, and bud drop
- Brown patches on leaves
- Roots are swollen, discolored, and started to get rot
- A foul odor comes from the plant.
Overwatering is caused by a lack of root aeration rather than an oversupply of water. Soggy soil conditions simply inhibit air movement inside the soil, depriving the roots of oxygen for respiration. Without a consistent supply of oxygen, roots become stressed and weakened, eventually dying or succumbing to opportunistic bacteria that cause root rot.
How to Restore a Dying Gardenia Due to Overwatering
Here are a few things that you can do to help fix a gardenia dying due to overwatering.
- Before watering, ensure sure the top inch or two of soil feels dry. Adding water without first determining if your plant requires it nearly always results in complications. Gardenias thrive when their soil dries up somewhat before being watered.
- Remember to drain any drip tray or cachepot a few minutes after watering to avoid sitting water on the roots.
- Use a large pot. After water, a little plant in a large pot will take a long time to consume the available water in the soil. Repot your Gardenia into a pot that is just big enough for it.
- Non-porous pot materials, such as plastic or metal, retain water in the soil for a longer period of time, extending the time it takes for the soil to dry. Using a terracotta container allows the soil to dry faster.
- Make sure the current pot you choose has enough drainage holes.
- Gardenias require at least 8 hours of direct sunlight every day to thrive. If you’re growing your plant inside, make sure it’s on a sunny windowsill. In reduced light circumstances, your Gardenia will require less water, and the soil will dry up more slowly, increasing the danger of overwatering concerns.
How to Restore a Gardenia Suffering from Root Rot
It’s a race against time to rescue your rotted rot since the disease will only worsen and eventually kill it if left untreated.
Here are the methods to check for treating root rot in gardenias:
- Carefully take out the gardenia from its pot and inspect the roots for any signs of rot. Rotten roots are mushy, brown/black, delicate, and have an unpleasant odor. To determine the severity of the condition. Slowly and carefully remove excess soil all over the roots.
- Remove all affected roots with sterile pruning shears. There is a chance you can save your plant if less than half of the roots are affected. If more than half of the roots are affected, it is probably best to remove the plant and start over.
- After you’ve pruned all of the affected roots, gently remove the remaining soil from around the roots. To avoid damaging the healthy roots, take your time and go slowly. Rinse the remaining soil away with water to expose the roots completely. It is critical to remove the old soil because it contains the same pathogens that were causing the root rot.
- Choose a clean pot and a potting mix that drains well. When choosing a pot for your indoor plants, it is important to consider the pot’s size, shape, and material. For best results, choose a pot that is at least twice as large as the root ball of the plant you are growing.
- Water the plant with a minimum amount. Watering a plant is an essential part of keeping it healthy. Too much or too little water can have a negative effect on the plant’s growth and health. It is important to gauge how much water your plant needs based on the conditions it is in, its size, and the type of plant it is. Try to water your plant regularly, but avoid providing excessive amounts of water that can cause damage or rot.
- For a few weeks, increase humidity and place in bright, indirect light. Roots are still recovering and stressed so better be watchful on placing the plant and adjust the humidity to at least 60%.
Why Are My Gardenia Leaves Dropping?
Leaf dropping is a worrisome issue that there are many causes underlying it. Here are some:
- Over or insufficient water intake. When your gardenia leaves start dropping, this is caused by either over or underwatering while growing medium any bacteria can collect at the roots and cause rotting which loss leaves in the form of drops (or necrotic yellows).
- Heat buildup (often in the summer). It is important that the plant have adequate airflow at all times to prevent overheating. Allow more time between waterings during hot weather; reduce humidity immediately if any leaf drop occurs due to heat buildup in the environment right before transplanting (“transient stress”).
- Dry air. When there isn’t enough moisture for sufficient transpiration of leaves, the upper surface dries out faster than normal leading to wilting foliage on lower leaves A lack of nutrients limits leaf growth which results in signs like yellowing or browning depending upon the nutrient.
- Alkaline soil can lead to leaf chlorosis. Leaf chlorosis is a condition caused by an imbalance in the levels of nutrients in the soil, which can result from alkaline soil. Alkaline soils are created when the pH level rises above 7.0, which can make it difficult for plant roots to absorb essential nutrients. This imbalance can lead to leaves losing their color and strength, and may even cause the leaves to fall off.
- Too much fertilizer. An excess of nitrogen in the soil triggers plant growth which leads to leaf drops. High levels of phosphorus and potassium sometimes occur during hot, dry weather when it is being fed excessively along with water shortage due to drought or cloudy rainy days.
- Acclimation. As the plant adjusts to your growing conditions and recovers from the stress of the journey to your home, it may experience some leaf drop.
- Low humidity and drafty location. Changes in environmental conditions can adversely affect gardenias, such as low humidity and drafts. Provide adequate ventilation to your plants, keep the area around them cool (50-60 degrees F) during the summer, and place them where they will receive ample light.
Why Are My Gardenia Leaves Curling Up?
There are a few reasons why your gardenia leaves might be curling up. One possible reason is that the leaves are drying out. Water your gardenia on a regular basis and provide it with lots of sunlight and fresh air. If the leaves continue to curl up after watering, you may need to apply a fungicide or pesticide to the plant.
Another possibility is that there is too much nitrogen in the soil. Nitrogen helps plants grow quickly, but too much can cause leaves to curl and turn yellow. You can test your soil for nitrogen levels by using a kit from your local garden center or by following these instructions:
• Soak a handful of soil in water for 30 minutes.
• Remove the soil and place it on a paper towel.
• Allow the soil to dry completely (about 24 hours).
- Compare the amount of moisture on a paper towel to the amount of moisture in the soil before soaking it. If there’s more moisture on a paper towel than in soil, add more organic matter (such as compost) to the gardenia’s soil mix until both readings are about equal.
What’s Causing My Gardenia to Wilt?
One possibility is that the soil may not be wet enough. Make sure to water the plant regularly and allow the soil to dry out between waterings. If the plant is in a pot, make sure to water it from the bottom of the pot.
Another possibility is that there may be too much humidity in the air. Try to increase ventilation in your home or office, or install a dehumidifier if necessary.
Another possible cause of wilting is a lack of sunlight. If there isn’t enough light reaching the plant, it will not be able to produce flowers or fruit and will start to wilt. You can try moving the plant closer to a window or placing it in a location with more sunlight. On the other hand, too much direct sunlight can also wilt the plant. If there is too much sun exposure, the leaves will start to yellow and fall off.
Summary
It is very important to take care of your gardenia plants so that they can live a long and healthy life. You need to provide the right amount of light, water, air, and nutrients for them to thrive.
To review, here is the summary of some basic tips for indoor care for gardenia:
•Provide sufficient light for the plant by placing it near a window or by using artificial lighting.
•Water your plants regularly; do not let the soil dry out completely.
•Keep the humidity at around 50% by using a humidifier.
•Feed your plants with organic fertilizers as much as possible.
If you follow the above tips, your gardenia will be happy and healthy.