
The Complete Guide To Cultivating Hostas – How to Grow, Care For, And Maintain Them!
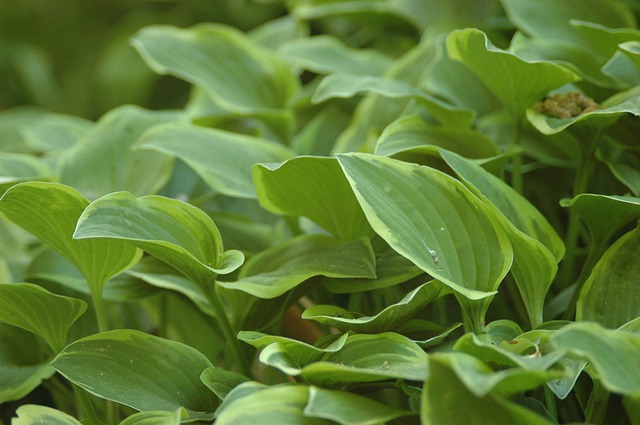
If you want to add some lush greenery to your home, you’ll want to add hostas to your list of plants. In this guide, we’ll cover everything you need to know about hostas, from growing them to caring for them and keeping them healthy. We hope this guide will help you start growing hostas in your garden and become a favorite addition to your landscaping. Hostas can also grow in a bog garden as long as the growing conditions suit their needs.
Table of Contents
When To Plant Hostas
Hostas are so easy to grow that there isn’t a specific best time to plant. No need to worry if a friend divides and shares a hosta plant. Planting divided hostas at any time of year is possible.
Wait until your hosta plant is mature (5 years) before dividing it. Then carefully separate the roots into small sections for replanting. This plant needs lots of water. Water deeply and frequently, especially in dry weather.
Plant Bare-Root or Potted Hostas in Spring
While hostas can be planted throughout the growing season, the best results come from planting just before summer. Early spring weather is less stressful on newly planted hostas. There is usually more rain during this time, which thirsty hostas love.
Plant bare-root or potted hostas in workable soil. Plant potted hostas as deep in the new soil as they are in the original container.
According to the hosta varieties, the height and width of spring-blooming Hostas (Hosta spp.) can range from a few inches to several feet. These perennials prefer USDA plant hardiness zones 3 through 9, with their emerging leaves in gold, blue, and green tones. A combination of warm weather and longer days encourages hostas to grow quickly in early spring.
Track Leaf Growth
When the temperature rises above 40°F, hosta varieties begin to sprout new growth, referred to as the bullet stage. When the weather warms up, a centralized crown with swelling buds responds by producing up to three leaves in the first few weeks. Hosta growth will be more vigorous in USDA zones 8 and 9, for example, because spring temperatures frequently remain in the 60°F range during the growing season.
When grown in well-drained, moist soil, the crown will produce new leaves until it forms a small mound of foliage. This crown, on the other hand, is highly susceptible to rot. Any mulch across the crown should be removed as soon as possible. The crown must have air circulating to prevent fungal and bacterial infections that could negatively impact leaf growth.
Roots Grow at a Slower Rate
Hosta roots have a lot of nutrients and water, but they don’t grow right away with the leaves. It could be up to a month before the roots start to grow. Warmer weather in USDA zones 8- 9 may make the roots grow faster with rising soil temperatures.
Old root tips and new root structures grow in fertile soil with much organic material. This helps the leaves grow above. Since hosta leaves can grow up to several feet and have a lot of transpiration surface area, the roots need to stay moist. Drought stress kills the plants during this critical growth period.
Summer Influence
The summer heat triggers the hosta’s reproductive habits. Hostas redirect their energy into flower stalk formation at this stage, and no new leaves usually emerge. According to Ohio State University Extension, a stalk can have 75 flowers. If the soil is moist and the temperature is between 60 and 70 degrees Fahrenheit, the hosta may produce new leaves as the summer heat fades.
Dormancy
Hostas respond to the cooler weather by going dormant. Due to the lack of cold treatment, the hosta may not respond as quickly in the spring for normal growth.
Remove dead foliage in late winter to allow the remaining leaves to photosynthesize. The fall leaf bud formation leads to spring growth if the hosta receives enough sunlight during the growing season. In the spring, plants in heavy shade produce small leaves.
August Is Also a Good Time To Plant Hostas in the US
In cooler climates, early August is ideal for planting hostas. Southerners should wait until the month’s end to avoid prolonged exposure to scorching heat. Because August is still warm, hosta plants require regular watering to establish healthy roots.
Use Potted Hostas in the Fall
Early fall, like spring, is ideal for planting hostas. In a warmer climate, late autumn planting may be successful.
Prefer potted hostas over bare-root plants now. It is possible to plant late-season container-grown plants because their roots have had ample time to develop. Plant hostas a few weeks before the average first frost date.
Hostas Planted Too Late May Rot
Planting late reduces the time your hostas have to grow new roots. Try not to rush it. Planting too late in the fall leaves hostas vulnerable to winter thawing and freezing. Prevent rotting and death of plants by thoroughly watering them before the first frost. Mulch around the plants.
Planting Hostas In The Summertime
As a general guideline, it has always been recommended to avoid planting in the summer, preferring to plant in spring and fall. This is a good rule, but it’s not a hard-and-fast law. Plants take root quickly in warm soil during summer because of the high temperatures. New plantings should not be made in direct sunlight; however, most hostas will be shaded, so this is not an issue.
Two Rules About Planting In Summer
- During dry spells, make sure to keep everything you’ve planted well-watered. It’s possible that your new hostas won’t thrive if you’re on vacation for a week after planting them. Aside from the fact that the roots of bare-root plants have been disturbed and take time to grow back, planting them in hot weather is also not recommended.
- Water is the most crucial ingredient in any garden. Some of you are currently experiencing water shortages in light of recent reports. However, we haven’t had any rain in New Hampshire in a while, so we’ve started to water our hostas with sprinklers. When the hostas are subjected to prolonged periods of dryness, they may shrink in size the following year.
As the plants dry out during the day, they are less susceptible to fungal and bacterial infections. The hostas will benefit from an hour or two of weekly water from a sprinkler during dry spells. A rainstorm isn’t always a reliable indicator of how much water has been absorbed by the ground. You can track how much rain fell throughout the storm using a rain gauge. The gardens need about an inch of rain a week to stay healthy.
Propagating Hostas
While many perennials require time-consuming lifting and division every few years, hostas are content to grow in their current location with little or no intervention. If you decide to propagate your hostas, they are among the most straightforward plants to divide and distribute to others in the garden. It only takes a small piece of root to start a new plant from scratch. Here’s how you go about it:
In the fall or early spring, dig up the entire plant with a sharp shovel or spade, allowing it to be completely free of the soil.
If possible, break the root ball into segments with your hands, but if the clump is too tough, use a trowel or shovel to break it apart. For a segment to survive, it should have some leaves attached to it. However, a small bare piece of root will usually survive and produce new shoots.
Placing the pieces in the desired location is the next step. Keeping the pieces for several weeks is possible if you keep them moist before planting them.
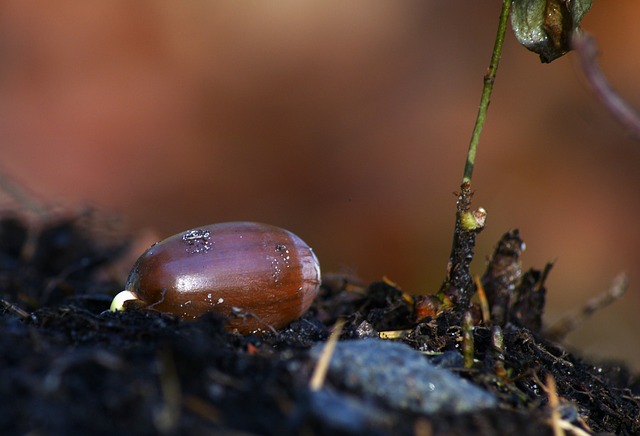
Hosta Seedlings
In many cases, collecting and replanting the seeds of a hybrid hosta will not make it “come true.” A few varieties are completely sterile, meaning they don’t produce any seeds. Do not be alarmed by the appearance of hybrid seedlings if they are grown from seeds collected from hybrid varieties. Most hybrid seeds produce offspring that have inherited traits from a parent plant. So, a variegated hosta can produce offspring with ruffled green leaves, for example.
If you’re a fan of plants, you may want to give this exercise a go. It’s not that difficult. Before breaking open the seed pods, wait a few days for the pods to dry out so that you can find the seeds inside. The seeds can be stored in containers filled with commercial potting mix and then planted in the spring during the winter. Place the seeds in a well-ventilated, well-lit area and cover them with a thin layer of potting soil. Until the seeds germinate in about three weeks, mist the soil daily. The seedlings should be kept in a slightly cooler location with indirect sunlight until they transplant outside.
How to Divide Hostas
Hostas thrive best when left alone to grow. Wide hosta varieties take five years to mature. After they mature, you may want to divide them.
Divide hostas in early spring or late fall, before the rainy season. Simply dig up any smaller plants that have formed around the main clump and replant them. Uncover a large clump and dig out as many roots as you can. (With a large hosta, you may need to dig 18 inches down.) Place the plant on a tarp and divide it into sections with your hands, a shovel, or a knife.
How to Grow Hostas in Containers
Choose Varieties
- There are so many different sizes of Hostas that choosing your plant before deciding on a container is the best strategy.
- There are tens of thousands of species, hybrids, and cultivars. It’s important to know that they grow smaller in containers than in the ground. Plan ahead of time.
- It is common knowledge that plantain lilies have wider roots than long ones. As long as the foliage grows horizontally, the roots will also grow horizontally. However, the roots will not grow as deep as the foliage.
Choose a Container
- Make your pot wider than deep, or at least the same depth and width. Because the roots won’t fill the lower portion of a taller pot, you’ll need to transplant or divide more frequently.
- Alternatively, buy a taller-than-wide container with an empty liter-size bottle. Ensure the bottle isn’t crushed and the cap is secure.
- This frees up space and reduces the container’s weight. Use a pot appropriate for your plant’s current size, not its eventual size. A pot three inches between the plant’s base and the container’s side is ideal.
- Hostas prefer cool roots, so avoid black or metal containers. Avoid using clay on concrete because it can crack and split in the winter, though there are glazed varieties that won’t crack for up to a decade. Consider using recycled plastic or fiberglass pots instead of plastic containers. Use pressure-treated wood.
- Make sure the pot has drainage holes. They hate standing water.
Use the Right Soil
- Hostas prefer loamy soil that drains well and retains water.
- Don’t worry about the potting soil too much.
- To improve water retention and drainage, get some good potting soil and mix rice hulls or sphagnum peat moss.
- In addition to being better for the environment, rice hulls are more cost-effective.
How to Pot and Repot Hostas
- Hostas thrive in plain old commercial potting soil in pots. However, the container should be at least the size of the mature plant’s foliage spread. Remember that container plants are susceptible to temperature extremes, so if you live in a cold-weather region, you may need to keep your pots in a cold frame or an unheated garage for the winter.
- In the winter, indoor air tends to be dry enough that potted hostas need frequent watering if they’re being grown there. The six-week chilling period will be required at some point in the winter.
- Repotting container-grown hostas in the spring is an option if you so desire. Even if the plant spreads, wide varieties can stay in the same pot for many years before needing to be transplanted.
Care Tips
Water
When hostas are just getting started during the first growing season, it’s crucial to keep them consistently moist. Check the soil for dryness every week or more frequently in the summertime, and water the top inch. There are times when the watering requirements of hosta plants will be met entirely by rainfall. You’ll need to water hostas under trees if growing them, as tree roots suck up all of your soil’s moisture. Larger hostas, whose leaves can form a canopy that shields the ground from rain, are similarly effective (and their roots). Watering can be reduced to once per week or every other week during germination. As your plants grow, they will require more water than this.
Hostas require a steady supply of water throughout the growing season to thrive. Dry conditions can inhibit plant growth, resulting in leaf scorching (browning). To conserve soil moisture, mulch the soil with 2 to 3 inches of wood chips, shredded bark, or other material such as leaves or grass. Watering your plants during prolonged periods of dryness is also a good idea.
The growth of a plant depends on the availability of water. Rain, irrigation, or hand watering are acceptable ways to get the recommended weekly watering amount of one inch. As a result of the increased drainage provided by sandy soil, Hostas may require more water. The most growth occurs when water is used at a rate greater than the minimum recommended. Preferably, hostas should be watered in the morning. Make sure no runoff is occurring by inspecting the soil. Good root development can be ensured by soaking the roots for an extended period.
A plant may occasionally show signs of dehydration. Burning can be seen on the leaf tips. This is because the leaf tips are the farthest from the roots, and the tip is showing signs of stress due to insufficient water supply. Insufficient moisture is another possible cause of drooping leaves.
Humidity and Temperature
Hostas aren’t picky about humidity or temperature so they can thrive in various environments. Planting them in a wind-protected area is the best option. Hosta houseplants can thrive in normal indoor temperatures as long as they have a period of dormancy during the winter.
Light
A few hours of dappled light each day is ideal for most varieties of Hostas, which can withstand full shade but thrive best when they get a few hours of sunlight each day. Plants with green and yellow variegated leaves should be exposed to the morning sun. Make sure your hosta variety’s light needs are met. The plant may get too much sun if the leaves turn brown at the tips, fade, or lose color.
Soil
You will need well-drained soil and good fertile soils rich in organic matter. Organic matter (compost, peat, rotted oak leaves, etc.) can help improve clay or sand-rich soils. Raised beds are ideal for sites with poor drainage. You will need a planting mix that contains a mixture of sand, compost, and organic matter. Ensure the plant mix has been tested for toxicity before using it in your garden. Nevertheless, the type of soil you use does not matter as long as it is loose enough to allow water and air to reach the roots.
Fertilizer
They don’t need a lot of fertilizer. If a hosta has been in the ground for at least one full growing season, it does not need winter protection. Fertilizers like 10/10/10 or 5/10/5 can be applied early in the spring, followed by another application six weeks later. Then they can be applied again in the middle of summer. Early April to mid-to-late May and mid-July are typical times for these applications.
Early in the spring, slow-release fertilizer is sprayed on the lawn. Osmocote and Sierra Blend, for example, have a three, six, or nine-month release period. On the other hand, heat and moisture may shorten the product’s shelf life. A midsummer application of regular granular fertilizer can be followed by an early spring application of three or six months of extended-release fertilizer.
Regarding fertilizer, the gardener will want to weigh the advantages and drawbacks of various options, including liquid, granular, or even extended-release granular. Apply fertilizer according to package directions, which should be marked on the container. Ensure not to fertilize the plant’s new growth, eyes, or leaves with fertilizer. In Ohio, all fertilizer applications should cease by the end of July. During the first fall frost, plants still producing new tender growth may lose that new growth. Hostas require a period of hardening off before being exposed to cold temperatures.
Soil and foliar applications of liquid fertilizer are both common. Apply it every 7 to 10 days according to the label instructions on the fertilizer bottle.
Composting in spring is the easiest and most effective way to feed hostas, and it’s also the most environmentally friendly. Soil food webs benefit from the addition of nutrients to the soil. A well-balanced organic fertilizer can feed hostas after planting or when the plants begin to emerge in spring. Fertilizer pellets can cause burns to the leaves if they become trapped.
Mulch
Hostas planted in the late summer or early fall benefit greatly from winter mulch. Hostas that have just been planted can be severely damaged by the repeated freezing and thawing of the soil during winter. A layer of weed-free straw, pine needles, or other mulch should be applied mid to late November to protect the plants from the cold.
Pruning the Hostas
Some gardeners remove the flower stalks as soon as they appear, but more knowledgeable growers understand the importance of the white or purple flowers to bees and other pollinators. After the flowers have faded, remove the stalks if you let them bloom.
Overwintering
Most regions don’t need to protect these hardy plants from the elements during the winter. Keep watering the plants, but reduce your fertilizer as winter approaches. Remove the dying foliage to keep fungus spores and pest larvae from overwintering. Rather than simply composting the foliage, it’s better to throw it away. Adding a dry mulch to the root crowns of trees in colder climates, such as pine needles, straw, or dry leaves, can be beneficial.
The best way to protect potted hostas from the winter elements is to bury them in the ground and then mulch them completely.
7 Tips For Growing Hostas in Landscapes
Hostas are Available in Various Sizes
If you buy a hosta, you need to make sure that the size of the plant matches the amount of space you have available. When they’re in a pot, all hosta plants look the same, but things completely change when they’re in the ground! One variety may only reach 6 inches, while another may reach a waist-high height with an equal spread.
It must be divided only when the hosta has outgrown its space and is interfering with other plants. So please read the label and consider how the plants will fill the space when grown. You’ll have to divide and transplant many plants if you choose varieties that grow too large or place them too close together.
Get Creative with Leaf Sizes, Shapes, Colors, and Textures
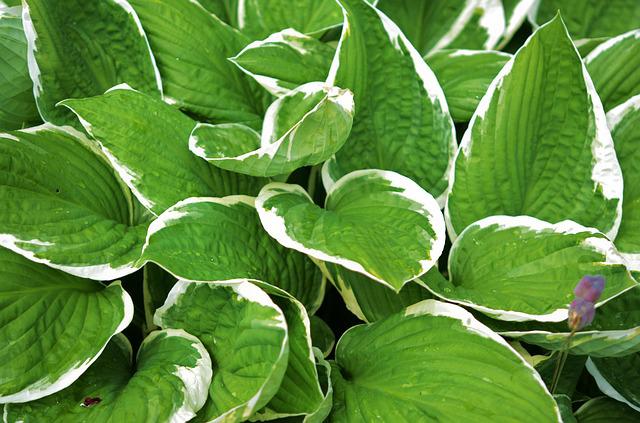
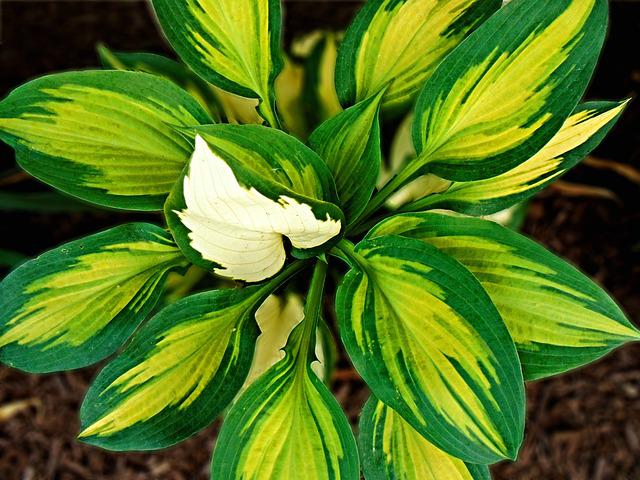
Thousands of hosta varieties are registered. Many cultivars have variegated foliage with white or gold edges, splotches, streaks, or splashes. Leaf shapes include round, oval, heart, and lance. Leaves can be smooth, pleated, dimpled, or puckered. You can create a beautiful tapestry of hosta foliage that lasts all season using these differences.
Hostas have large leaves and a dense landscape presence. Combine them with fine-textured plants like ferns or the lacy leaves of astilbe, goatsbeard, thalictrum, and bugbane. Textured plants like Japanese forest grass (Hakonechloa), carex, and Acorus are also good for textural contrast.
Hostas Bloom Too!
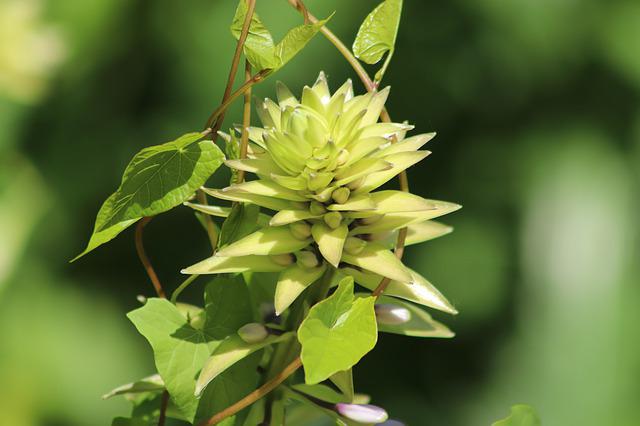
Although hostas are grown for their foliage, most cultivars flower from mid-June to September. Hosta flower spikes have tubular blossoms that open gradually from the bottom up. Flowers are usually pale lavender but can be pink or white.
They are not showy, but they attract hummingbirds. Flower spikes are sometimes removed by gardeners who dislike their appearance. This does not harm the bees or hummingbirds that normally feed on nectar, except for the Hosta plantaginea (above), which has stunning, fragrant flowers.
Shade Quality Is Vital
All hosta varieties will thrive in the dappled shade beneath trees or with 4 to 5 hours of morning light. When plants receive lots of light, their leaf colors are brighter and more variegated.
If you garden in the south, be careful where you plant hostas. Too much sun or not enough rain can harm the leaves. If the leaves develop scorched edges or brown tips, move the plants to a cooler, moister location.
Hostas can be grown in full sun in the northern states if they get enough water. When choosing plants, remember that some can tolerate more sun than others. Fragrant hybrids (with H. plantaginea) tolerate more sun. Too much sun turns blue-green leaves yellow-green.
Seasonal Calendar Maintenance for Hostas
Spring
Hosta shoots start growing in early spring, and the leaves open a few weeks later. By late spring, the leaves have grown to their full size (the process takes 6-8 weeks).
- Apply a slow-release fertilizer.
- Divide and transplant hostas.
- Examine for signs of Hosta Virus X
- Start pest control
- A lot of things can help protect shoots from late frosts. They could be cloth, pots, extra paper, or more mulch.
Summer
In mid-to-late summer, most hostas bloom for about three weeks. There are new buds at the base of the plant after its flowers. These buds will grow into flowers in the spring.
- Watch the leaf edges turn brown, a sign of hosta scorch.
- Don’t let the soil dry out. This can lead to heat dormancy or dry rot when plants don’t get enough water.
- Do not water your plants as much at the end of the summer to help them go dormant.
Fall
Hosta greenery starts to die back when there are a lot of frosts. First, it turns to gold, then it dries out and droops.
- Cut back the leaves and flower stalks.
- Clean up around plants and put mulch on them.
- Before the first freeze, make sure you have enough water.
Winter
Plants hibernate in the winter, so their leaves fall off and look dead. During this time, the roots are putting away energy for the spring to be ready.
- Since it gets dry in the winter, you should water a little.
- If your plants have been exposed to frost heave, cover them with mulch again to keep them safe.
- In the spring, they will come back.
This seasonal calendar is by gardendesign.com.