How To Plant A Daylily Bulb? Steps and Tools for Growing Your Daylilies, Tips & Tricks!
When planting daylily, you need to consider what kind of daylily variety you are planting to evaluate the selected site if it’s suitable or not. Determine when to plant, the sunlight it needs, the right time for planting, planting root preparation,the depth, etc. Daylilies are an excellent choice for adding a touch of elegance to your garden. Keep reading!
Table of Contents
Determine What Variety
Figure out what kind of daylily it is before deciding where to plant it. Most varieties grow well almost anywhere, but paler shades may require more sun, while some darker-colored varieties thrive in partial shade.

Site Selection
Select a location that possesses the following characteristics:
- Daylilies require sunlight ranging from direct sunlight to partial shade (for instance, morning sun and afternoon shade, or dappled sun throughout the day). Daylilies require at least 6 hours of direct sunlight per day to bloom.
- The soil ranges from neutral to slightly alkaline. Daylilies can tolerate a wide range of pH, but soil with a pH of 6.5-7 is ideal. In most cases, adjusting the pH is not necessary.
- Soil that is moist and well-drained, ranging from clay to sand. Daylilies grow in many soil types, but they thrive in moist, well-drained soils.
When to Plant
The best time to plant Daylilies is in late spring or early fall. They are recommended to be planted eight weeks or more before the first hard frost occurs in areas where winter temperatures regularly drop below zero degrees Celsius.
How To Plant
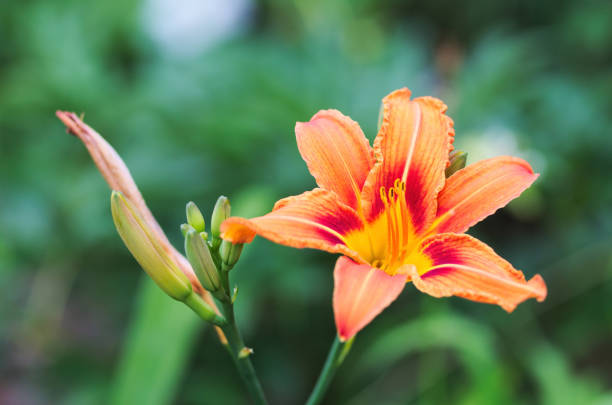
Daylilies are classified according to their flower color, form (trumpet, double, ruffled, recurved), height, and bloom time. Planting a variety of lilies with early, mid, and late blooming tendencies is a good way to ensure that you have daylilies all summer long.
Light
Daylilies must have full sun (six or more hours per day) and moist, well-drained soil to thrive. Before planting, amend the soil with compost.
Time for Planting
Plant daylilies in the fall or early spring when temperatures are still cool in the South, and in the North, plant in the spring when temperatures are still warm.
Planting Root Preparation
Until you’re ready to plant your roots, keep them stored in a cool place. Before planting, soak the bare root for an hour or two in water.
Make a Hole About a Foot in Depth
Construct a mound of loose soil in the bottom of the hole. It serves as a holding area for the root. Daylilies spread their roots over the mound. Then, fill the area around the root with loose soil to complete the planting. Flowers should be spaced 18 inches to 24 inches apart in their beds.
Cover the Crown
The crown is the region at the top of the plant where the leaves meet the roots. Assemble an inch of loose soil around the crown for added protection. Maintain a moderate amount of soil compaction around the roots, but don’t go overboard. Mulch with pine straw or bark to keep the weeds at bay.
Water the Plants Immediately
If the soil is dry, water your daylilies every day for the first week or two after planting. Daylilies are extremely hardy and do not require much winter care, but a layer of mulch may be beneficial in helping them establish a more robust root system.

The Best Way to Grow Daylilies from Fans
If you want to plant a large area on a budget or if you want more variety than your local garden center has to offer, you should look into an online daylily retailer (I like Smokey’s Garden) for bare-root daylily fans.
Planting fans take a little more effort, but the savings outweigh the effort! All you have to do is loosen the soil and work in some compost to improve the soil structure and drainage.
Plant the daylily fans about an inch underground, with the crown about an inch. Water thoroughly after smoothing and firming the soil around the plants with your hands.
Depending on your plans and budget, you can plant a single fan, two, or three in the same location. The daylilies will fill in overtime, so planting one or two fans in each spot will eventually result in a lush flower bed, but if you want a more immediate impact, plant three fans per hole.
A layer of mulch around the plants will help keep the soil moist and prevent weeds from taking over while the plants are still young.
Dividing Daylily
Daylilies grow in clumps that grow larger and larger over time until they die off on the inside due to a lack of nutrients and moisture.
Fortunately, daylilies are very simple to divide! Unlike Irises, which requires a knife to cut through the tubers, you can do the job with your hands (wear gloves!) and a shovel.
Begin by digging up the entire clump and then simply pulling it apart with your hands. If the clump is too difficult to manage, poke it with a shovel and pry it apart. You may accidentally kill a few sections, but don’t worry, they’ll regenerate.
When I was in a hurry and needed to give someone a daylily division, I would dig up a section of the plant and fill the hole with compost. I’ve never killed a daylily in that manner!
Daylily division is best done in the spring. The plants are not only smaller and easier to manage, but the ground is also wetter and easier to manipulate.
