
How to Prune Daylilies—The Best Way To Cut Daylilies
Daylilies are a beautiful and popular flower that can be pruned in many ways. Knowing how to prune daylilies will help to keep them looking their best and help them perform better in the garden. Here are great tips on how to prune daylilies:
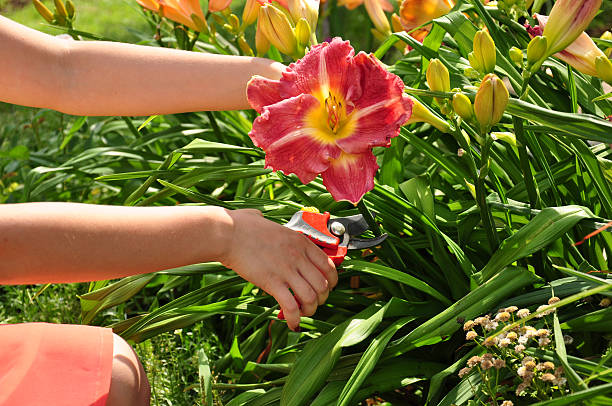
Table of Contents
Step 1: Deadheading
Throughout the season, use your fingers to remove any dead blossoms. “Deadheading” is another name for this procedure. You may be eliminating multiple buds from a single daylily because of how many flowers they produce. If you notice any wilting or dead blossoms on your daylilies as they begin to bloom in the spring, you should take immediate action. Make sure to remove any dead flower heads from the plant by pinching them with your fingers and snapping them off. Checking on your daylilies once or twice a month is fine, but it’s best to do it more frequently if possible.
Step 2: Cut Diseased Leaves
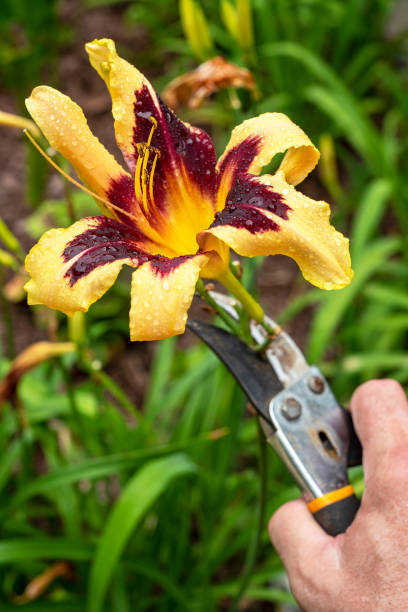
Keep an eye out for brown streaks on your plants, which could indicate leaf streak disease. Get rid of the clumps of daylily leaves that have died. Clear out your daylilies in the autumn to not get moldy over the winter. Grasp a mound of brown leaves poking up from the soil while wearing gardening gloves. After removing this clump of dead leaves, proceed to the rest of the area and do the same. Pruning shears can be used to remove any leaf deformities that you notice. Position the shears approximately 1 to 2 in (2.5 to 5.1 cm) above the plant’s base. Avoid cutting or removing the entire crown of the flower; otherwise, the flower may be unable to regrow.
Step 2: Mulch Your Daylily
Use mulch to prevent weeds from growing around your daylily plants. Check out your local gardening supply store and scoop up a few ground bark chips or pine straws to use in your landscaping. Mulch should be applied beneath the bottom of the plant to discourage the growth of weeds. Mulching also aids in the conservation of water by your daylily plants.
Plant Trimming and Dividing in the Spring
Step 1: Dig Up the Whole Roots
Dig your daylily plants up to the ground and remove all the roots. Place your shovel beneath the daylily plants and try to locate the plant’s root. Dig beneath the plant with enough force to dislodge the roots and dead daylilies. With your shovel, remove the entire base of the plant from the soil and place it in a new, flat location. You must remove the whole patch of daylilies before replanting them.
Step 2: Cut the Crown
Pruners can be used to cut the crowns. Place the shears about 1 to 2 inches above the plant’s base. Cut the crown, so there are no dead leaves left. Cut or remove the whole crown, and the flower might not grow back.
Step 3: Separate Fans
Daylily, plants that have been trimmed should be spread out and separated. To begin, dig through the huge clump of soil with your small gardening rake or spade. The individual stems and root structures should be separated from one another with the help of this instrument. To separate and fan out the stems of each plant that has become tangled together, put your fingers between the stems and pull them apart gently.
Step 4: Plant Back
Ensure that your daylily plants are spaced no more than six inches (15 cm) apart. A portion of your yard should be tilled. Then it should be fertilized with a long-lasting fertilizer. Replanting daylilies require digging a large enough hole to accommodate the root system’s needs. Daylilies need to be kept apart so that they can develop properly.
Check the root system of any newly divided daylilies before planting them to ensure that the roots are fully intact before planting them. Ideally, the roots must be at least 4-5 inches (10 -13 cm) in length when properly extracted.
Step 5: Water After Planting
After replanting the daylilies, make sure to water them thoroughly. Watering the soil around the new transplants can ensure that the roots are well-watered. Overall, aim to provide your plants with approximately 1 inch (2.5 cm) of total water per week.
Daylily Pruning in the Fall
Step 1: Remove the Clumps
Dead daylily leaves should be removed in clumps. Clear out your daylilies in the autumn to not get moldy over the winter. Grasp a mound of brown leaves poking up from the soil while wearing gardening gloves. After removing this clump of dead leaves, proceed to the rest of the area and do the same.
Step 2: Locate the Crown
To locate the daylily’s crown, look at the base. The daylily stems can be found in a pile of decomposing flowers. If you haven’t yet gotten rid of the dead leaves, use your fingers to separate the foliage, which will help you locate the plant’s white crown or base.
Step 3: Trim the Crown
Pruning shears can be used to trim the crowns. Shear the plant 1 to 2 inches (2.5 to 5.1 cm) from the ground. Remove any dead leaves from the crown by trimming them cleanly. If the flower’s crown is cut or removed, it may not regrow.
Is It Necessary to Deadhead From Daylilies?
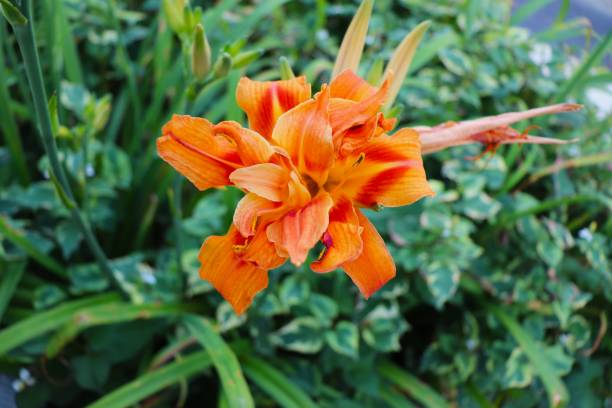
This daylily produces more blossoms if you remove the entire stalk, rather than leaving the stalks to mature into seed pods that ripen in the summer and burst in the fall.
Daylily flowers that have been finished are unattractive. Flowers that have been spent quickly decompose and then dry over undeveloped buds, preventing them from bursting open. This can be avoided by picking out the dead blooms.
Daylilies that haven’t been deadheaded will also produce seed pods, so be sure to do that as well. As a result, the future flowering potential is hindered by this seed production. The plant will produce more flowers in the future if the seed pods are removed.
Daylilies don’t need to be deadheaded every day, but it’s still a good idea. A few times during bloom should be enough to prevent mature seed pods from developing on the plants.
As if that wasn’t bad enough, the finished blooms of daylilies are a mess in the garden. Remove the old blossoms to keep the plant and the rest of the garden looking tidy.
When Is the Best Time to Deadhead Daylilies?
Daylilies bloom only once a year, in the late fall or early spring. When the flowers have finished blooming, it’s time to remove the deadheads. Remove the scapes of plants that no longer have buds ready to bloom to tidy up the plant and encourage future bloom. Destroy any flower heads forming seed pods before they crack open at the top, a sure sign that the plant is ready to set seed.