
How To Cut Zinnia Flowers? 5 Steps to Cut Your Zinnia Flowers and Tips for Longer Shelf-Life After Harvest
To cut zinnia flowers, select the blooms you would like to cut. Once you have selected the blooms, stand them up on the end and make a diagonal cut just below the base of each bloom. Do you want to learn how to cut zinnia flowers with ease? If so, read on! In this post, we will teach you the five steps to cut zinnia flowers so that you can create beautiful arrangements at home. We will also provide you with some harvesting tips. So, if you want to start cutting zinnia flowers, read on!
Table of Contents
5 Steps to Cut Your Zinnia Flowers
Step 1: Get Your Tools Together
Bring your garden shears and bucket with you. The flower stem needs to be put in the water right away.
Step 2: Pick the Stems that are the Strongest
Give them the wiggle test to determine which stems are ready to be cut. Gently wiggle the stem back and forth, holding it about eight inches from the flower. Wiggle the stems and cut the ones that are the strongest. They won’t stand up in the vase if they are still very floppy. If the flower’s head is loosely perched atop the stem, it is not yet ready to be picked. You can tell if a flower is ready to be cut for a vase on the kitchen counter by how sturdy the stem is and how still the flower head is.
Step3: Reduce Costs
You might be tempted to make shallow cuts if you want more flowers later in the season. Please don’t! The deeper you go, the more likely the plant will respond by growing longer stalks.
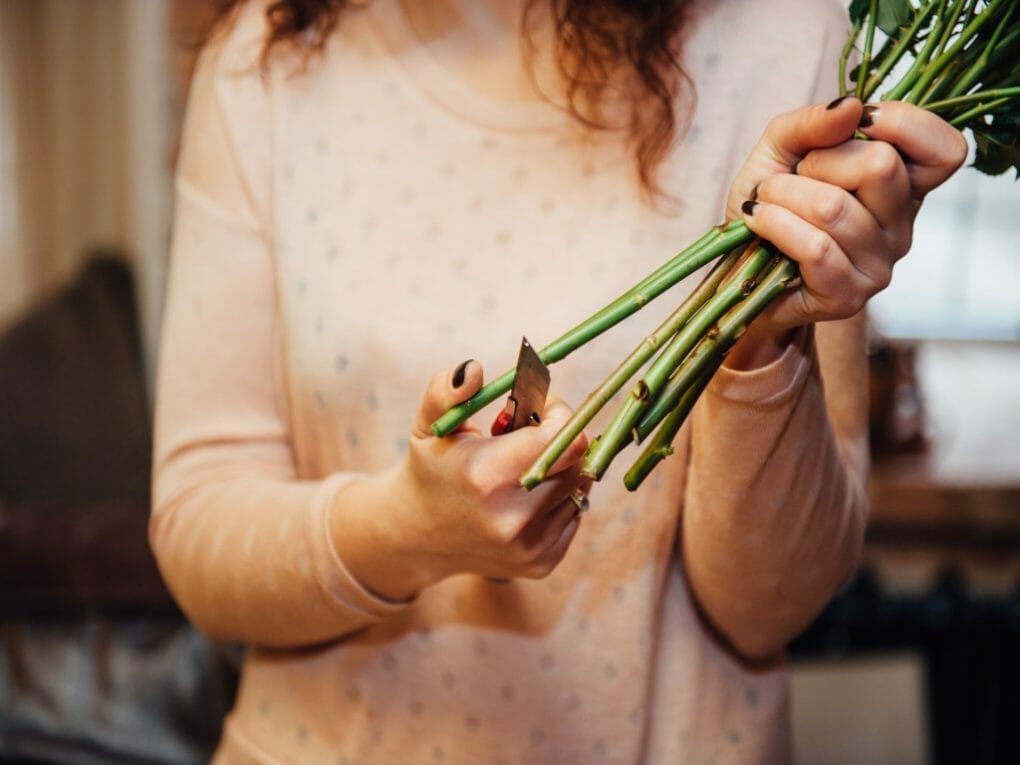
Step 4: Make a 45-Degree Angle Cut
After stripping the stem, recut it at a 45-degree angle. The stem’s ability to absorb water will be maximized thanks to the slant of the cut. To extend the life of your flowers and get the most pleasure from them, keep them in a cool, dark place and change the water every day or two.
Step 5: Put It in a Bucket and Put It Somewhere Cool and Shady
After trimming, zinnias should be brought inside or placed in a shady area where the temperature stays in the 60s or 70s. When exposed to sunlight after being harvested, their quality rapidly declines.
Harvesting Tips
Know When to Pick
It’s not hard to get zinnia blooms (just cut them), but you need to know when they are at their best. Usually, you want to pick flowers when they are just starting to bloom. If you see small yellow flowers in the middle of the flower heads, you missed the best time to pick them.
Flowers that are picked too early or after they are at their best usually last less time in a vase and may even cause the whole stem to wilt. Flowers are best picked in the early morning or late evening when it is cooler, and the wind has died down. If you pick your flowers at the right time, they will look their best and last the longest. Of course, there will be different rules if you’re harvesting zinnia seeds. First, we’ll talk about flowers, and then we’ll talk about seeds.
Remove the Spent Blooms From a Plant Before Harvesting
Last but not least, if you want to enjoy your zinnias in the garden (along with the butterflies), deadheading is the key to prolonging their blooming period.
To “deadhead” a flower is to remove the spent bloom. When the petals on a flower start to wilt and look ragged, it’s time to trim the stem. Removing a flower after it has bloomed can keep the plant from producing seeds.
Some examples using calendula flowers are shown below. One of the stems completely escaped my control and went to seed. As for the other, it’s a flower past its prime.
Maintaining a Spotless Environment Is Essential
The importance of tidiness during the flower harvesting process cannot be overstated. Before beginning, be sure to clean and sanitize all of your equipment and the surrounding area. As a result, your flowers will retain their beauty for as long as possible.
It’s crucial to leave as much of the stem as possible when cutting the plants. When cut, the stems of your flowers will be longer, improving their appearance in bouquets and encouraging the plant to produce even more of them in the future.
Clear away leaves, but don’t just leave them lying around the garden or on the sidewalk. Pests and diseases can thrive in debris, so reducing its accumulation is crucial for plant health.
Pinch Early to Encourage Branching
This step requires a little planning to get your plants earlier in the season. If you already missed the time, don’t worry; move on to the next two suggestions. Learn how to use pinching to get more blooms if you’re reading this in the spring to get a head start on the season.
When you pinch flowers, you leave the plants at about 12 inches before chopping off the top 3–4 inches, just above a pair of leaves. This pinching method will encourage the growth of more lateral branches, resulting in more stem-bearing flowers.
Summertime Pruning Encourages Reblooming

If you forgot to pinch your zinnias when they were young, you could still use one of two tried-and-true methods to extend their flowering period.
Zinnias can be coaxed into continuous flower production throughout the hot summer by regularly cutting the flowering stems. The good news is that zinnias are a joy to harvest regularly because they make such a beautiful, long-lasting cut flower.
Tips for Longer Shelf-Life After Harvest
If you want your flowers to last longer:
- After cutting a stem of zinnias, putting it in a bucket of cold water will help them last longer in the vase.
- After bringing the stems inside, remove the leaves from the lower two-thirds of the stem. The leaves will rot and foster bacterial growth if the stem is submerged in water.
- Keep them out of the light and in a cool place.
- Use a commercial flower extender in the water and change it daily (or more often if it looks cloudy).
- Don’t risk killing your fresh-cut flowers by putting them in lukewarm or ice water.
- Don’t put flowers on display unless you’re using them within the next day or so.
- Adding a mist of water to cut flowers creates an atmosphere similar to a humid climate. Hydrangeas are one example of a flower that can take in water through its leaves and petals.
- Make sure to recut your stems every few days.