
Overwintering Dahlias in Pots: Tips and Advices
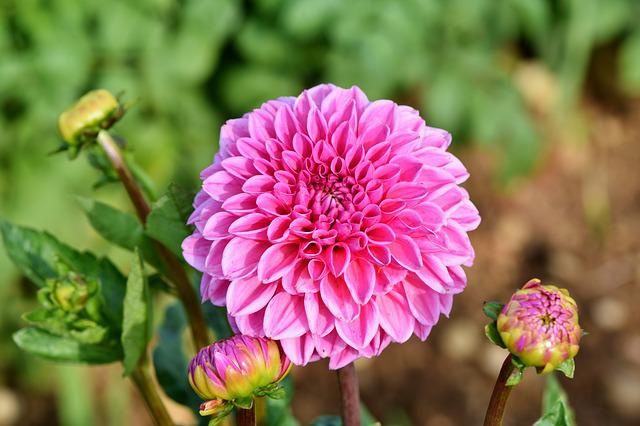
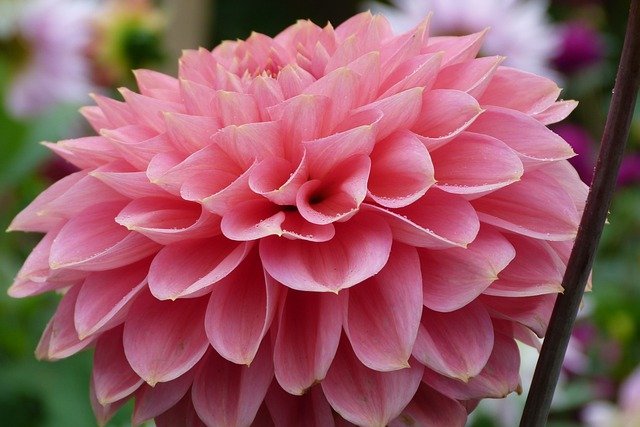
Dahlias are one of the most popular annual plants in the world, and for a good reason. They’re beautiful and succulent, and they bloom year-round! If you want to grow dahlias from seed in the next few years, or if you just want to enjoy the flowers throughout the winter, you need to know how to overwinter dahlias in pots. This blog provides tips on how to do this, including the best way to repot dahlias during overwintering, the best way to water them in overwintering, and more. So whatever your dahlia gardening plans may be, check out this blog first!
Table of Contents
Tips on How to Overwinter Your Dahlia in Pots
It might seem daunting to overwinter your dahlia in pots, but with a little preparation and some tips from this blog, it’s quite easy! Here are some key points to keep in mind when overwintering your dahlias:
1. Start by selecting the right pot. Dahlias need plenty of space to grow, so make sure the pot you choose is large enough! If you’re planning on growing more than one dahlia in a pot, make sure the size of each pot is equal.
2. Make sure the pot is well-drained. Overwintering dahlias in pots require plenty of water; if the pot becomes too wet, your plants will rot. Make sure to backfill the pot with soil after watering it regularly during overwintering to keep its moisture level consistent.
3. Prepare your propagating material ahead of time. If you’re growing dahlias from seed, divide them into small pieces before planting them into their new pots. This will help the plants quickly establish a strong root system once they arrive in late winter or early spring!
4. Give your plants plenty of sunlight. Dahlias need bright, indirect light to perform well in overwintering, so make sure to position them so they receive as much sun as they need.
5. Do not fertilize your plants during overwintering. Overfertilizing can encourage growth at the expense of blooms and will likely result in weaker plants when you bring them out into the garden in springtime!
6. Mulch your dahlias for extra protection from frost and cold weather. This will keep the soil warm and moist throughout winter, helping your plants stay healthy and flowering all winter!
How to Overwinter
- Keep your dahlias from freezing by bringing them inside for the winter. Although hardy in US hardiness zones 7-10, dahlias should be brought indoors for the winter in colder regions.
- Even in areas where dahlias are hardy, many gardeners choose to bring them indoors for the winter to inspect them and give them a rest.
- They believe giving the plant a break will help it thrive and produce more flowers.
- After the first frost, dig up the dahlias. Keep the dahlias in the soil until a hard frost kills the leaves and stems, signaling the beginning of winter dormancy for the tubers. You have plenty of time to dig up your dahlias, which is good news. They are very tolerant, and frost won’t harm the tubers.
- After the leaves have turned black, cut the dahlias down to a height of 2 to 6 inches (5.1 to 15.2 cm) to make removing the roots less hassle.
- Digging up the plants should be done on a dry day.
- Use a garden fork to carefully pull up the tubers. When harvesting the tubers, dig a hole in the ground about 6 inches (15.2 cm) away from the blossoms and thrust the garden fork into the ground. Carefully loosen the soil around the entire plant, taking care not to damage the tubers.
- To remove the tubers from the ground, re-insert the garden fork into the soil and pull back on the handle. Garden forks are ideal for this task, but a dirt shovel will do in a pinch.
- It is important that the tubers’ protective outer “skin” not be harmed. The outer skin of the tuber is compromised when it is injured.
- If you plan to store you can keep them in a cool, dry, and dark location.
- Dahlias kept in pots over the winter should be brought into the light and warmth and given just a little water — about 2 cups. In about two weeks, you should start to see some growth. Unless it is very dry, avoid giving it any additional water. Since the nutrients for dahlia roots come from the bulb, they don’t need much water at first. The roots will rot as a result of excessive moisture.
Repotting Overwintered Dahlias
Quick Inspection
The Dahlia tuber clusters should be tipped out of their storage containers as a starting point. Look for any tubers that are visibly split, shriveled, or rotten. To get rid of them, use a sharp knife to carefully cut them away, secateurs to snip them off, or gently twist the affected tuber, which poses less risk of accidentally damaging healthy tubers.
Manually Examine Each Tuber
It’s crucial to inspect each individual tuber in the cluster if one appears healthy but is rotten beneath the surface. Squeeze every tuber to check that it is firm and healthy, and discard any that aren’t. You’ll soon be able to tell if a tuber is bad. Fortunately, smelly tubers aren’t that bad, but squirting is possible no matter how carefully you handle them.
Refresh and Replant
After removing any dead or diseased material with your hands, you should be left with a cluster of healthy tubers that are still connected to a piece of stem. Large groups of tubers can also be divided at this time. During the checking and cleaning process, they occasionally separate and split. If not, a gentle pulling might reveal a weak line that you can exploit.
You should be able to pot up the piece you cut off and start a brand-new Dahlia plant from it as long as it contains one or more storage tubers and a piece of the plant’s stem or growth node. We initially had five or six bought-in tubers, but over the past few years, we have grown our stock to about twenty plants.
Every tuber needs to be replanted in a mix of fresh and old compost. Each tuber should be repotted in a mixture of old and new compost. You can use all-fresh compost, which isn’t a bad idea if you intend to keep the