
How to Fertilize Dahlias? 4 Easy Steps to Get Started
Dahlias are lovely flowers that add a splash of color to any garden. To fertilize your dahlia, you must conduct a soil test before applying. Knowing the soil condition means a lot since it will determine how much nutrients your dahlia needs. In this article, you’ll learn the basics of dahlia fertilization, including the ratio of nutrients that are necessary for healthy growth and a step-by-step guide on how to fertilize dahlias. After reading this guide, you’ll be able to fertilize your dahlias the right way and enjoy blooms that last all season!
Table of Contents
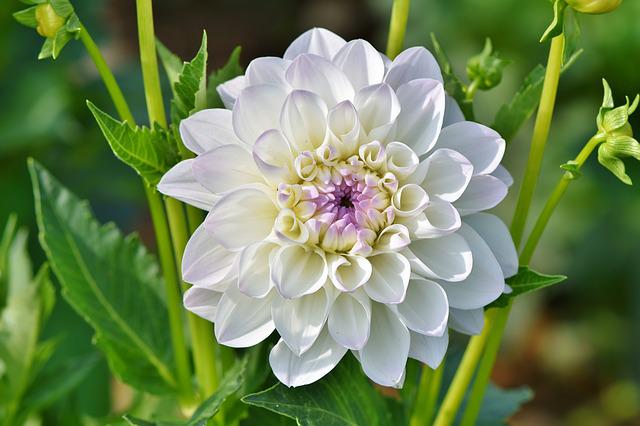
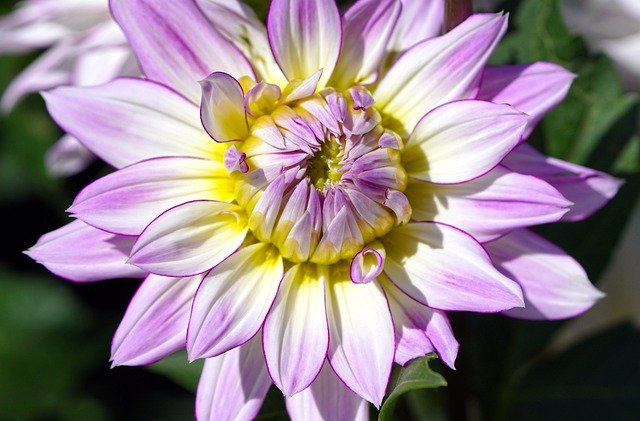
Fertilizer for Dahlia
To produce blooms, flowering plants, such as dahlias require higher concentrations of the other two macronutrients than vegetables and other plants. Dahlias, much like many other flowering and fruiting plants, require less nitrogen than potassium or phosphorus in their soil. Choose a fertilizer ratio formula in which the first number is less than the last two. The first number indicates nitrogen concentration, while the second and third indicate potassium and phosphorus concentrations, respectively. These vital nutrients provide the vitality for dense, upright bushes and flower-laden branches.
Professional dahlia growers recommend numerical fertilizer formulas such as 5-10-10, 10-20-20, 6-24-24, or even 0-0-10. The amount of nitrogen is indicated by the first number, which is smaller. The flower production of dahlias can be greatly improved by fertilizing them only twice. Take care not to overfertilize, as this can lead to wilted leaves, sagging leggy plants, and a general decline in plant health. Fertilizer requirements for dahlias can be kept in check by amending the soil before planting. To improve the soil’s porosity, drainage, and fertility, you should till it deeply (at least 10 inches/25 cm) and incorporate a lot of finished compost or leaf litter.
At the start of the growing season, when the plant’s attention is solely focused on the development of its leaves, a higher nitrogen dosage may be beneficial. To achieve the most vibrant coloration possible, you should consider switching to a 0-10-10 fertilizer formula when the plant is just beginning to bloom.
Fertilizer applications at full strength are safe for dahlias. However, you may consider using half strength if the soil in which your dahlias are grown is not depleted or poor. An excess of fertilizer causes the leaves to turn yellow, the stems to become floppy, and the leaves to be weak. One of the best choices is well-composted manure, which can be easily produced at home if a person keeps a few chickens or rabbits as pets.
Indications that Your Dahlias Lack Nutrients and Need Feeding
Dahlias require more fertilizer than most other flowering plants in your garden.
When plants are deprived of the three macronutrients, they require an extended time, and growth tends to stall. There may be no new leaves or buds on the plant even though it is still mid of summer.
If the issue persists, the foliage will change color, pale and wilted, and eventually die. Leaves and unopened flower buds can fall off. Nutrient deficiency symptoms include flimsy stems, discoloration, and vulnerability to pests and disease.
Easy Steps on Applying Fertilizer to Dahlia
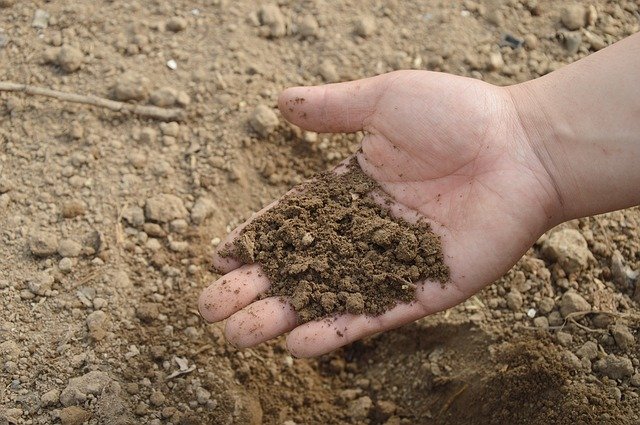
Step 1 – Conduct a Soil Test
Before applying, you must conduct a soil pH test first to determine your soil condition and the nutrient your dahlia needs and avoid overfeeding. A balanced mix of 10-10-10 or 20-20-20 should be used if the phosphorus content of the soil is less than 500 ppm and it is sandy or loamy. Choose a ratio, such as 10-20-20 or 5-10-10, with half the nitrogen of the others if the soil is clay or you are using water beads. You should use a fertilizer with a lower potassium content, such as 5-5-10 (for clay soils) or 10-5-10 if your soil has a high phosphorus content (sandy soils). Fertilizers with high nitrogen levels can stimulate growth before flowering, while lower nitrogen fertilizers can be used to maintain flowering levels during the growing season.
Step 2- Mix Fertilizer Correctly
Many believe that fertilizing dahlias with liquid fertilizer is easier than mixing a soil-based fertilizer. This couldn’t be further from the truth! You must mix soil-based fertilizers correctly to achieve good results for your Dahlia plants. First, wet the planting area thoroughly before adding any compost, manure, or other organic matter. Then add enough dry matter (the sum of nitrogen, phosphorus, and potassium) to make a thick paste that will embed into the soil. Do not overmix – too much labor will result in wasted nutrients and an unhappy plant!
Step 3- Apply Half a Cup
Half a cup (118 ml) spread in a ring around the plant 2 feet (61 cm) in diameter and lightly worked into the soil should be enough. To facilitate faster uptake by the plant and to prevent burning of the surface roots, water the plant food so it can start seeping into the roots. The tubers should be fed 30 days after planting and a month later. Because of this, no further fertilization of the plants should be required. Always check for pests and diseases, and give your plants plenty of water. Resolve problems that may arise in large, fruitful dahlias.
Step 4- Applying Every 3-4 Weeks
Dahlias are beautiful plants that can add a touch of elegance to any garden. However, they need care and attention to thrive. Fertilizing dahlias every three to four weeks during the growing season with a balanced fertilizer is the best way to ensure they get the nutrients they need to grow. Always read your fertilizer label to make sure it is appropriate for dahlias specifically, and be patient – fertilizing dahlias can take time. Still, it’s well worth it in the long run! If the plant looks wilted or droopy, it probably needs more water – give it a good soak before watering again. Also, fertilizing with high phosphorus in the early summer will help the plant grow taller. You can stop giving them food when the dahlias die in late summer because the plants will soon go to sleep for the winter. You want to stop dahlias from making leaves by the end of the season so that their tubers can store enough food.