
How To Grow Gardenias? —Learn About Their Growing Conditions for a Healthy and Thriving Plant!
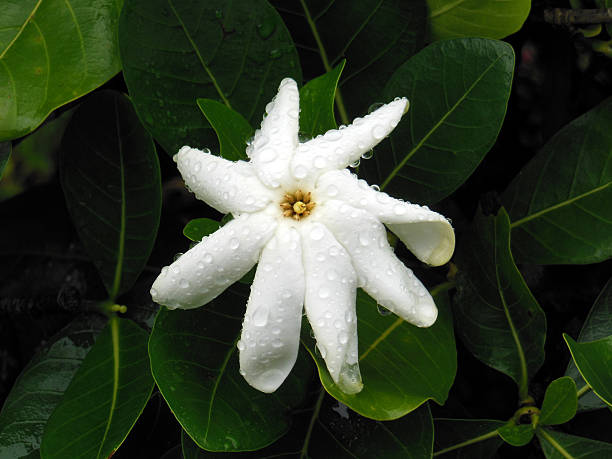
One of the most popular garden flowers, Gardenias is a perennial shrub that can grow up to 4 feet tall. It has beautiful flowers with a sweet scent. Gardenias are easy to grow but require some attention throughout the year. This flowering shrub has become a beauty, elegance, and grace symbol. So how can you grow this plant in your garden? This article provides you with all the necessary information about the growing conditions of Gardenias.
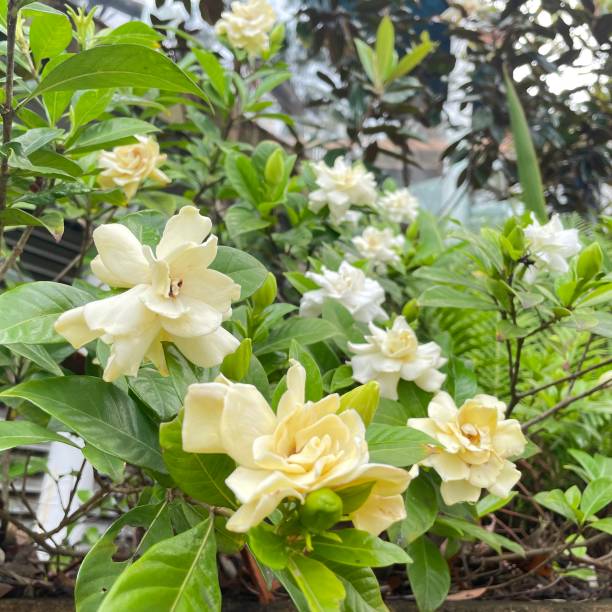
Table of Contents
Gardenia Growing Conditions
Light
It is recommended that gardenias be planted in the shade, preferably out of direct sunlight in the afternoon. Gardenias thrive in hot climates with plenty of early morning sun and afternoon shade. Their roots may be protected by organic mulch in milder temperatures, allowing them to take advantage of all available light. To achieve the best results, gardenias in pots should be placed in bright sunlight or filtered shade, away from direct sunlight. Gardenias grow with long, weak, thin leaves when exposed to too much shade. The number of flower buds produced is lower, and those that do form may fall off before they have a chance to open. When gardenias are exposed to direct sunlight, they begin to wilt more quickly than in partial shade.
Water
The use of rainwater to water your plants is highly recommended rather than using tap water. Water your Gardenia at least an inch per week to flourish. Allowing the plants to become scorched before watering them is not recommended, and doing so regularly is. If you do not maintain consistency, the buds and leaves may fall off. Maintain constant moisture in the soil without allowing it to become soggy. Extreme humidity in the soil allows air to escape and fungus to attack the roots, causing them to die. If the dark green leaves turn yellow, the plant may perish (chlorotic). Watering should be kept to a bare minimum throughout the winter.
Fertilizer
Gardenias love to be fed with nutrients. The 15-15-15 (Nitrogen, Potassium, and Phosphorus) fertilizer can be diluted in 1 gallon of water and provided to your plants once a week using a 1/4 teaspoon solution. Garden plants should be fed acid fertilizer in March and at the end of June.
It’s essential to use an acidifying fertilizer in the spring after the cold winter has passed. Feed them again in mid-summer and late June in four areas that have been around for a while. This will make sure that the gardenias will bloom in the fall. Don’t feed your gardenias in the fall if you plan on leaving them outside all winter. If the temperature drops below -9.4°C, new growth could be killed. This time of year is a good time to stop feeding your plants. This will give you enough time to grow strong before the cold weather comes.
A fertilizer with iron and magnesium is recommended because gardenias have a lot of leaves that turn yellow because of chlorosis or chlorosis.
Keep your container plants healthy by feeding them an acidifying fertilizer every three weeks. Plants may benefit from regular applications of acidic mulches like coffee grounds or fish emulsion, or blood meal, and acidifying fertilizers like fish meal or blood meal.
Humidity
Gardenias thrive in environments with high humidity levels of at least 60%. In the soil, apply a layer of pine straw, bark, or organic mulch at a depth ranging between two and four inches to aid in the preservation of moisture and suppress weeds that take up excessive amounts of water.
Temperature
Gardenias are extremely sensitive to changes in temperature and humidity. They prefer 18.3 degrees Celsius (65 degrees Fahrenheit) during the day and 15.6 degrees Celsius (60 degrees Fahrenheit) at night. If the temperature rises above that threshold, buds that have already formed may fall off.
Soil
When planting outside, it’s critical to assess the pH of the soil and make any necessary amendments to ensure that the plant grows in the best possible conditions. Gardenias are acid-loving plants. They require soil with a pH between 5-6 and a high concentration of organic matter to thrive. Standard potting mixes with a peat base can meet this need. One teaspoon of agricultural sulfur sprinkled into the planting hole may aid in lowering the pH of the soil, which is beneficial for plant growth. When planting, use peat moss or compost as a base, and then cover your plants with a few inches of mulch.
It is common for soil compaction to be caused by a buildup of fine or coarse particles and pores, making the surface less resistant to percolation by rainwater. As a result, water flows faster across more compressed surfaces. If there is no permeability, cultivators must bring in horizontal tillage equipment such as potato planters (for mincing) and other similar items for plants to benefit from garden irrigation systems, which is not always possible.
Gardenia Soil Mixture
When growing gardenias, stay away from heavy, alkaline clay with poor drainage and coarse, sandy soils. The ideal mixes consist of equal parts fibrous loam, peat moss, and well-decaying manure, or one-part loam, one-part leafmold, and one-part well-decaying manure depending on the situation. Make a hole about one foot deep and two feet wide in loam or sandy soil. Mix the two types of soil in there. For heavy clay soil, dig a larger hole and add some coarse sand to the previously mentioned combination. Some gardeners believe that we should dig a 3-foot-deep trench in heavy clay soils and fill the bottom with crushed rock or gravel to improve drainage and allow for more root growth. Gardenias have shallow roots, so avoid gardening around the root zone once they have established themselves.
Soil ph Level and Nutrients
Before using aluminum or iron sulfates, a soil test should be performed to determine the soil acidity. Browning the leaves, first at the tips, then loss of foliage. Sapcalculated roots (acids in the leaves or hair) respond well to acidic soil. Too little water can also cause acidity; rainwater is preferable to hard tap water.
If the soil is acidic. Iron and aluminum become soluble and toxic below pH 4.5, causing bud drop. The leaves turn chlorotic in alkaline soil (pH > 7). Organic matter, like peat, keeps the soil acidic.
The soil can be amended once it is no longer acidic or alkaline. For 6 months, add gypsum (1/4-1 teaspoon per gallon) or organic mulch (wood chips). Supplemental fertilizers must be held until curing. If these compounds kill beneficial microbes during natural decomposition, their absence may cause them. Too acidic soils use calcium before losing it, causing aluminum toxicity and chlorosis. Aluminum leaches magnesium and iron from plants if these metals are unavailable for biosynthesis (below pH 4). When sulfur is converted to sulfides, nitrogen from polluted soils can eutrophicate water bodies.
Anemia is another cause of chlorosis. Like alkalinity, the calcium content in soils tends to be higher initially and then declines over time (relative time). Short saturated periods also cause problems deeper in the soil where plant roots are before root heat enters the soil and lifts minerals from lower levels. Excessive soluble amounts can cause plant problems or scabs. Stress caused by their outer skin drying out too aggressively due to weather conditions and high temperatures causes chemical imbalances in plants, causing leaf scorch. Acidity (specifically a pH above 5), salinity, nitrogen deficiency, etc.
Maintaining a pH balance in the soil is essential for plant growth and reproduction. Depending on the situation, regular replenishment is necessary to maintain beneficial microorganisms that promote decomposition and remove excess salts from the soil that could harm plants. Regular use of soluble fertilizers improves nutrient availability by improving plant uptake (compared to nitrogen fertilizer alone), which aids release and uptake.
Some soils lack micronutrients like zinc, calcium, and iron. These can be fixed by topdressing, formerly known as “bouncing.” When vertical cultivation is used intensively over time, it eliminates rooting areas that could enclose micronutrient-deficient plant parts. Still, it has recently become a reconditioning method that takes advantage of the microorganisms that break down and recycle these minerals, increasing nutrient uptake from the soil by plants.
Pruning Outdoor Gardenias
A light pruning of gardenias removes dead growth and discarded flowers. Pruning gardenia bushes in the summer should be done after the flowers have faded to avoid damaging any buds. Check to make sure the variety you’re growing only blooms once and has finished its flowering cycle before you begin trimming it. Remove fading flowers below the leaf node if it blooms more than once to encourage recurrent flowering. A typical blooming cycle lasts from early spring to midsummer. Since gardenias bloom on new growth, cutting them from autumn to spring will eliminate future blooms. Occasionally, to promote thicker, more lush growth, gardenias should be shorn back to the ground after flowering.
To avoid the spread of disease, pruning shears should be cleaned and sanitized after each use. Use hot water to clean the tools and disinfect the blades with concentrated household disinfectant. Wipe the blades with a paper towel after letting them sit for a few minutes.
After the last flowering period, pruning your Gardenia in February or March will keep it in shape.
If your shrub’s milky-white flowers turn an unappetizing shade of rust, don’t panic. It simply denotes that the flowers’ blooms have faded. Don’t cut back on the plant after it’s finished flowering, or you risk reducing next year’s flowers by removing buds that are already developing. As long as they are grown in the right conditions, gardenias should require minimal trimming.
Suggestions for Planting and Site Selection
Gardenias are easy to grow, even if you’re a novice. Here are some pointers for getting started.
- Gardenias thrive in hot, humid climates, but they may suffer if planted in full sun for the duration of the summer. If you live in a warm area, try to avoid the hot midday sun by choosing an area that gets plenty of bright morning sun and afternoon partial shade.
- When planting gardenias, fall is often the best time of year. Gardenias should be planted at least six weeks before the last expected fall frost date in frost-prone areas.
- To ensure that the Gardenia has plenty of time to grow before the winter, it is best to plant in the spring in cooler regions (Zones 7). Pick a spot with full or partial sun exposure. If you live in a climate zone lower than 6, you should not grow gardenias outside year-round.
- Gardenias are known for their strong scent, so when choosing where to plant them, keep that in mind. When placed near a window or in a high-traffic area, their scent can become overpowering!
- A plant shouldn’t be buried any deeper than it was at the time of planting. Overly deep planting of gardenias can cause them to become irritated.
- Planting Gardenias far apart and away from other large plants helps them thrive. It’s best not to plant any of these plants near them because they’re all surface rooted.
- The stucco finishing on walls and fences can be washed away by rain or a hose if you plant gardenias in a wind-sheltered location. What happens is that the lime in the soil is absorbed by the stucco.
- During the hours of 11 a.m. to 2 p.m. in the middle of summer, the south side of your house is the best place to plant your Gardenia.
- Blossoms can be burned by the sun if it is too hot and there is little humidity. A gardenia shrub does best when syringed once or twice a day, except when in full bloom.
- Protect plant roots from the winter cold by covering them with a thick layer of mulch in the fall. A permeable cloth or other material should be used to cover the plants at night when temperatures drop below 15 degrees Fahrenheit (-9.4°C).