
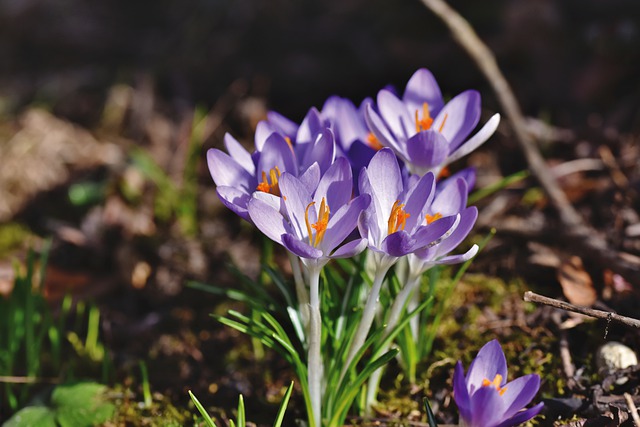
Does Iris Have Seeds?

You can grow Iris from seeds. Iris can be grown from rhizomes, but it’s also possible to grow the flowers from seed pods. Getting more iris flowers in your garden by growing them from seeds takes some time, but it’s a good and cheap way to get more flowers in your garden. A wild iris seed can be shaken out of its capsule in mid-August. Pods are the first to be harvested in a large-scale operation.
Table of Contents
Saving Seeds
A great way to spread the word about your garden is to share seeds with other gardeners. When the ends of the seedpods begin to split, it’s time to collect them. Finish drying the pods by placing them in a warm, dry place. Keeping the seeds cool is as simple as removing them from the pods. Store your seeds in the refrigerator in an opaque plastic container. The plant information is written directly on the container by me. Put the dried seeds in a sealed jar and store them in the fridge. Seeds can be directly sown in the fall or early spring outside. Several years will elapse before the plants reach maturity and begin to bloom.
How To Grow Iris From Seeds
To make unique hybrids or color combinations, you must start your iris plants from seed rather than tubers. This requires more time and effort, but the rewards are worth the effort. Aside from Japanese and Siberian irises, which grow in USDA plant hardiness zones 3 through 9, most irises can be started from seed with some success, but it’s best to start them from cuttings. To ensure that your seedlings are true to the parent plant, only use seeds from nonhybrid iris varieties when starting them from seed.
Step 1
A bowl of plain water will do. Soak the iris seeds in water with a saucer on top to prevent them from floating to the surface. Change the water daily while the seeds soak for two weeks. Seeds are more likely to germinate if soaked in water before planting.
Step 2
After the initial two-week water soak, mix one-part bleach with ten parts of water in a small bowl. Remove any mold spores present by soaking the seeds for 30 minutes in the bleach solution. To remove the bleach solution, run a cold water stream over the seeds.
Step 3
Seal a clear plastic bag around the seeds to keep the moisture in. For 12 to 14 weeks, keep the bag in the refrigerator, mimicking the cold weather that forces iris germination outside.
Step 4
Iris hybrida, grown in USDA zones 3 through 7, can be removed from the bags and kept at room temperature for three days. After cold treatment, these need to be kept at 55 degrees Fahrenheit.
Step 5
Add 90 to 100 degrees water to a bowl after three days of holding at room temperature. Except for bearded iris, soak any seeds that have not germinated for an hour daily in water. The most viable seeds will sprout within a week of receiving this treatment.
Step 6
Add half a cup of moist sand to a 2-inch pot and shake it to distribute it evenly. Use a pot with a bottom drain hole. Sprout iris seeds 1/2 inch deep and plants one per pot with the sprout visible above the sand surface. A warm, sunny window is ideal for keeping the sand barely moist and from drying out completely.
Step 7
A seedling tray filled with sterile soil-free potting mixture should be used to transplant the sprouts once they have grown to a 1-inch height. Roots need room to grow, so place the sprouts 3 to 4 inches apart in the tray. Plant each sprout separately in a 4- to 5-inch diameter pot as an alternative.
Step 8
Place the seedlings 2 inches above the light source using a cool fluorescent white grow light. Adjust the light’s height as the plants grow to keep the distance constant.
Step 9
Water the seedlings when the soil feels dry but not soggy, with just enough water to dampen the soil. Irises should be watered every two weeks with a solution of 1 teaspoon of a 30-10-10 fertilizer dissolved in 1 gallon of water.
Proven Techniques for Growing the Best Irises and Seeds
- Iris Seeds from Louisiana At times, bees will be active in your garden, and if you grow Louisiana Iris in your garden, seed pods are likely. However, if you wish to attempt cross-pollination for a specific color line or other characteristics, you must do so manually.
- While some knowledge of genetics is beneficial (for example, about dominant and recessive colors), most decisions are made based on observations.
- Begin with newer varieties and determine which produce superior seedlings, color lines you wish to pursue, and other desirable characteristics.
- While some varieties are more fertile than others, it is more likely that other factors influence pollen ‘taking.’
- Pollen must be fresh (early morning is ideal), there must be no rain or wind, and there should be no early morning appointments. Numerous hopeful crosses have been lost as a result of inclement weather.
- If you are hybridizing for commercial purposes, you should seek out colors that do not fade and a firm substance to support the blooms.
- Although the shape will vary according to the recognized flower types, petals must be relatively even.
- While bud placement is important, you should aim for at least four bud positions on a single stem, with the majority of positions having two buds.
- Certain varieties grow more slowly than others, and if a plant does not produce at least two increases per year, it may not be worth keeping.
- Seeds planted in the same location will not result in identical plants.
- Seeds from the seed pods formed after flowering are used to create new varieties.